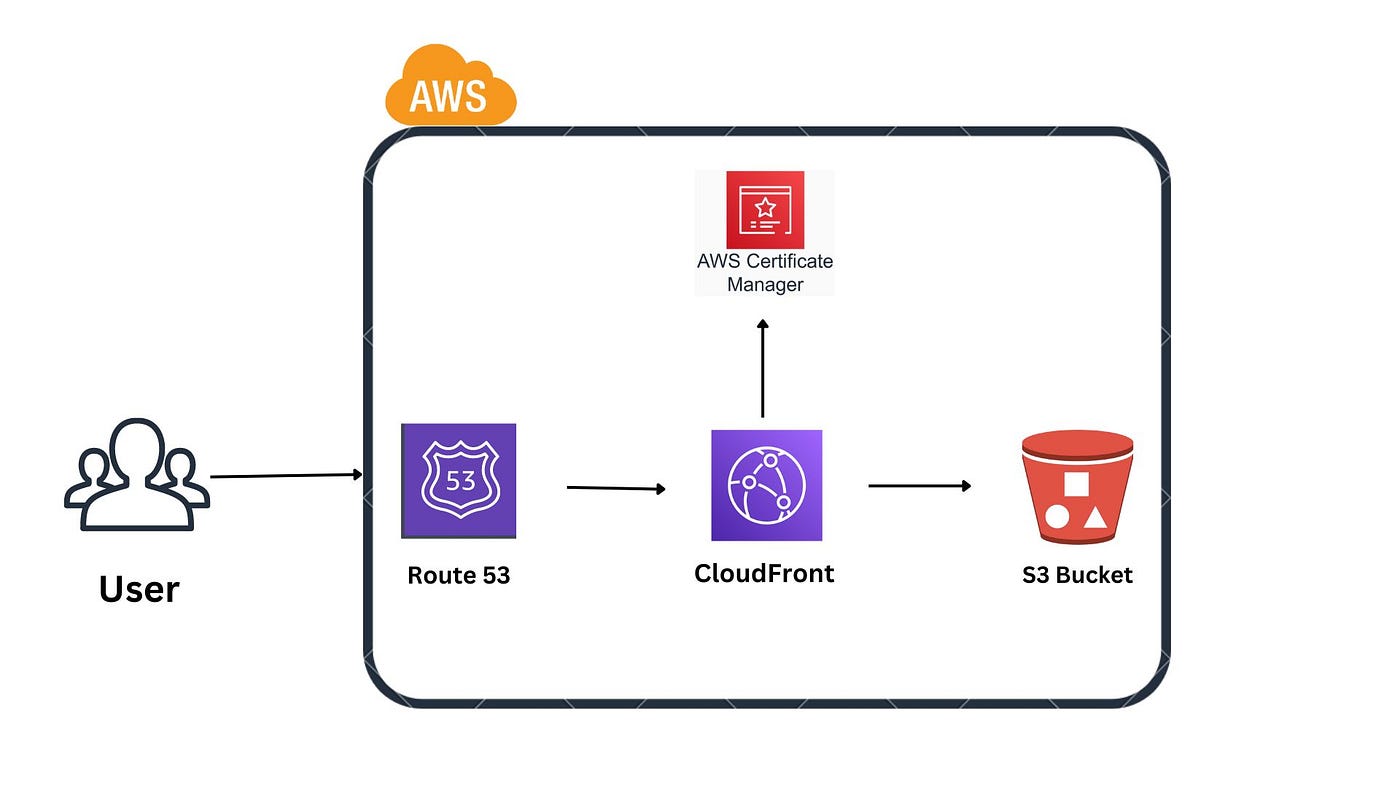
Deploying a React App using AWS S3 and Cloud Front
Amazon Web Services (AWS) offers a set of powerful tools that enable the seamless deployment of applications. In this article, we will walk through the entire process of deploying your React app on AWS. From setting up your development environment to hosting the application using an AWS S3 bucket and completely setting up HTTPS and a custom domain.
Introduction to AWS S3
Amazon Simple Storage Service (S3) is a scalable object storage service that allows you to store and retrieve data. However, S3 is not just for data; it’s also an excellent choice for hosting static websites and web applications. S3 makes web hosting and content distribution simple with its powerful features and seamless connectivity with other AWS services.
What is AWS CloudFront?
Before we dive into deploying our React app, let’s introduce another essential AWS service: Amazon CloudFront. AWS CloudFront is a content delivery network (CDN) that accelerates the delivery of your web content to users worldwide. It distributes your content over a network of international data centers to offer low-latency access and quick data transfer rates.
Domain Name System
A Domain Name System (DNS) is like the internet’s phonebook. It translates human-friendly domain names (like www.example.com) into IP addresses that computers understand. You must correctly establish DNS settings in order to connect your custom domain to your React app running on S3. This is where AWS Route 53 comes into play.
AWS Route 53
Amazon Route 53 is AWS’s scalable and highly available DNS web service. You can use it to manage DNS routing and domain registration for your applications. You can effortlessly set up and manage DNS records with Route 53, ensuring a seamless connection between your custom domain and your S3-hosted React app.
Let’s Get Started
Now that we have a basic understanding of the key AWS services involved, let’s get started with deploying your React app
Prerequisites:
Before we continue with the deployment process, it’s important to ensure that you have the following prerequisites in place. These foundational elements will set the stage for a smooth and successful deployment:
Install VSCode?
Set up Git & GitHub
Install Node.js and npm
Create an AWS account
A React App
For the purpose of this article, I am using an already existing React project for the tutorial; however, you can follow along by cloning the project.
Step 1: Create a React App
Since I already have an existing React project, I will go ahead and clone my project locally. You can, however, create a React app using the following steps:
npx create-react-app my-app
cd my-app
npm start
// The next step will be to build the application.
npm run build
Once you have confirmed that the application runs as it should in our browser, you can run the build command. This will bundle our React app into production mode in the build folder, which we can use for the next steps.
Step 2: Deploy React App to AWS S3 Bucket
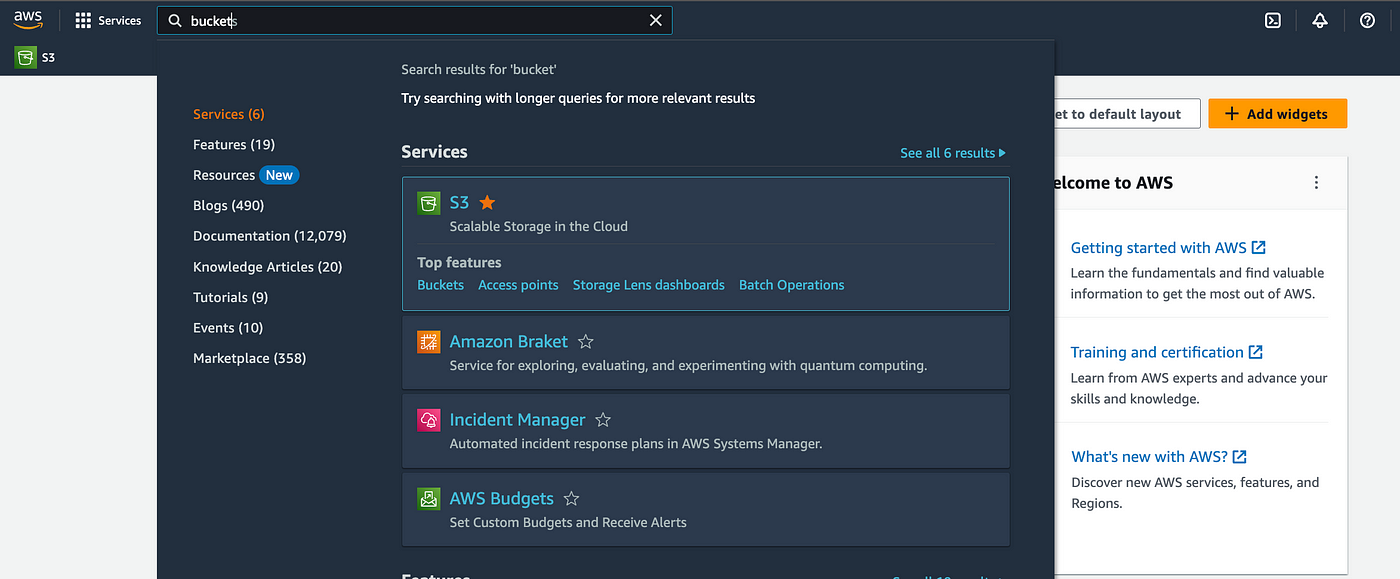
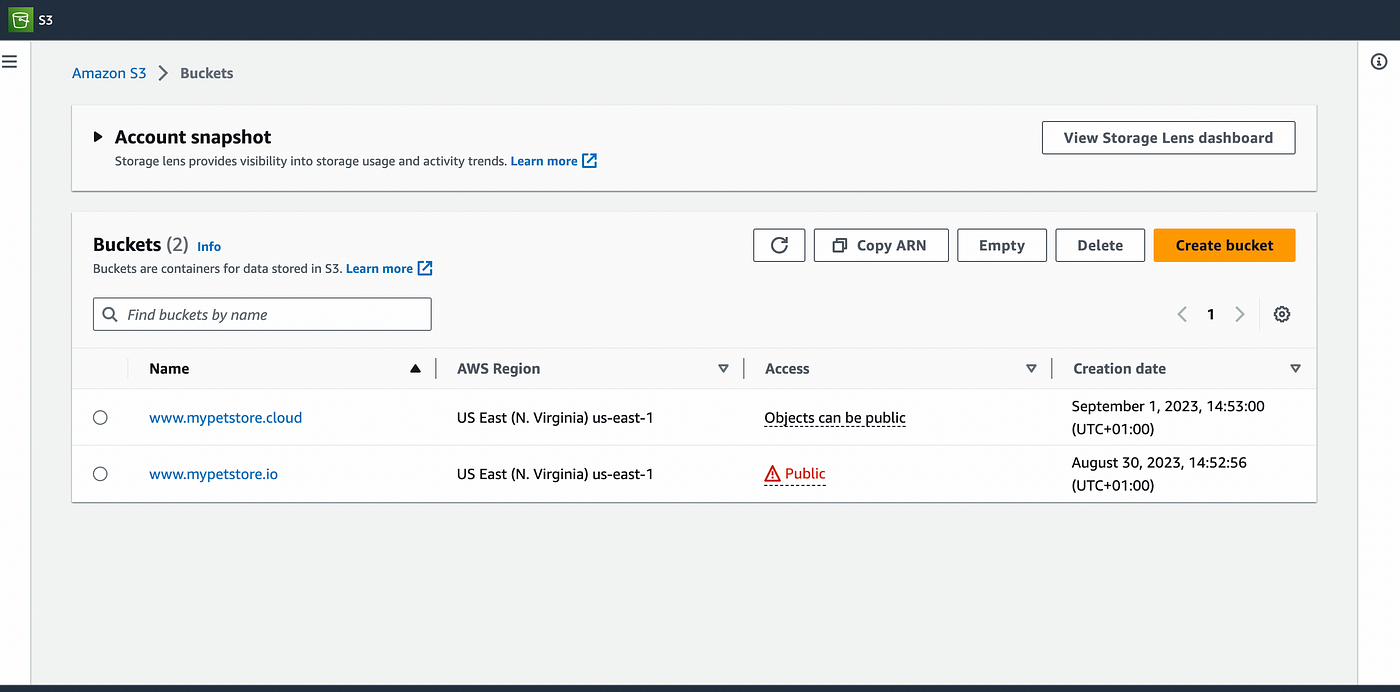
Open your AWS console and type “Bucket” in the search bar.
Select the S3 service.
Once opened, you should see a page similar to the image below.
Proceed to click the “Create a bucket” button.

Give your bucket a name. I will be calling this bucket “mypetstore.cloud” but you can use any name of your choice.
Specify your preferred region
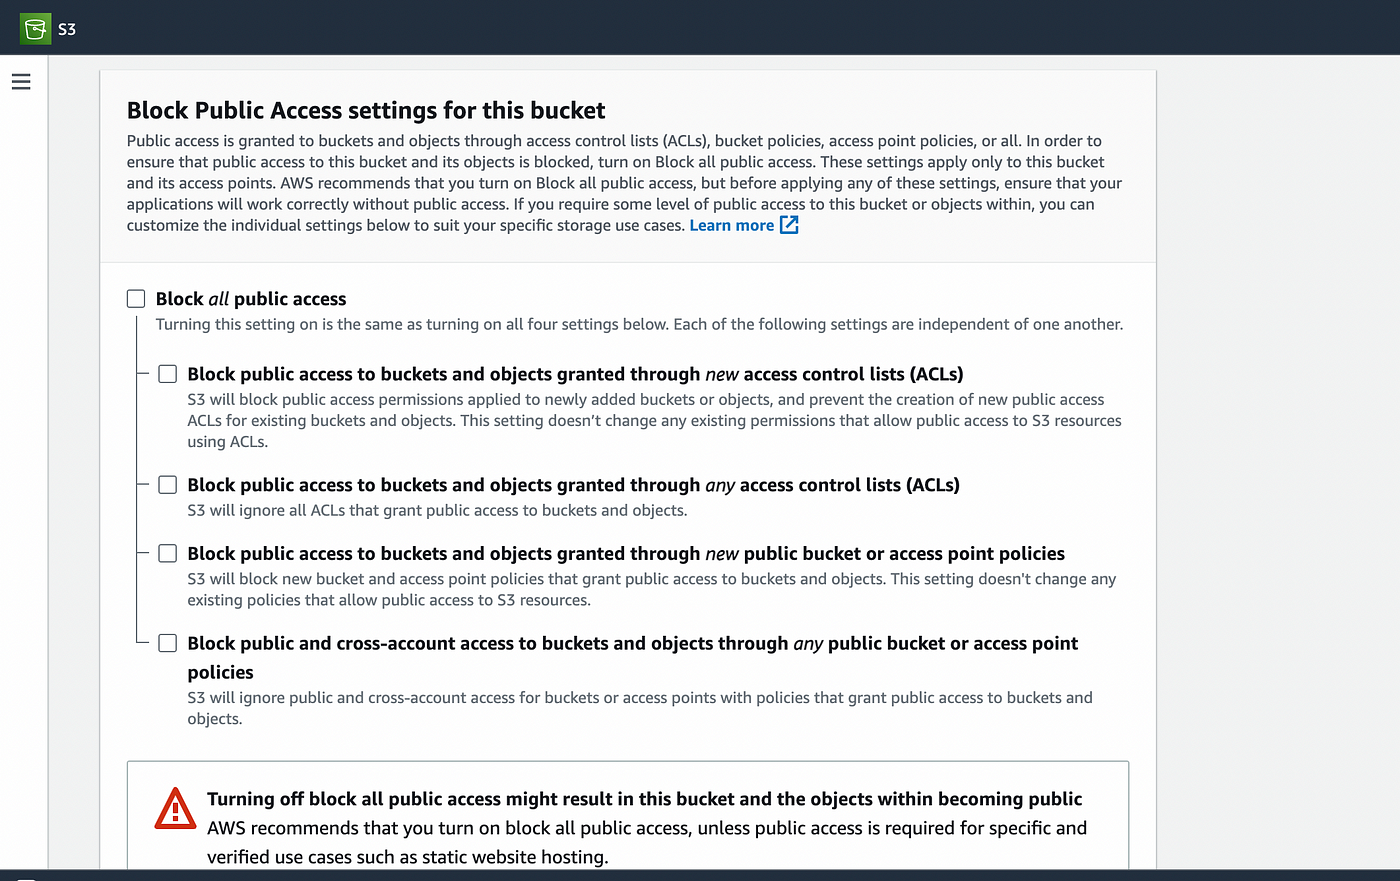
Enable public access to your S3 bucket and then save. I will leave all other options in default.
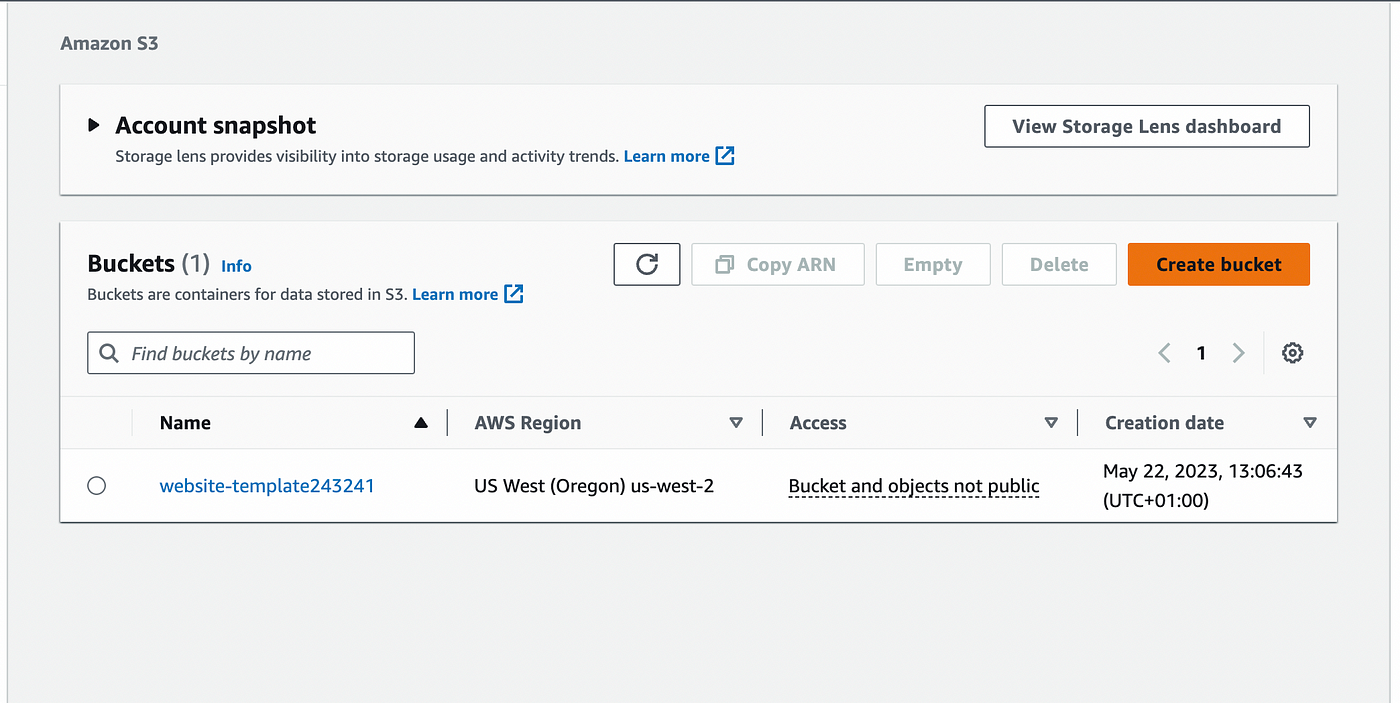
Your bucket should have been created and should appear in S3 like the image below.
Navigate into the bucket we just created, where we will import the content of the build folder in the React App into our S3 bucket.
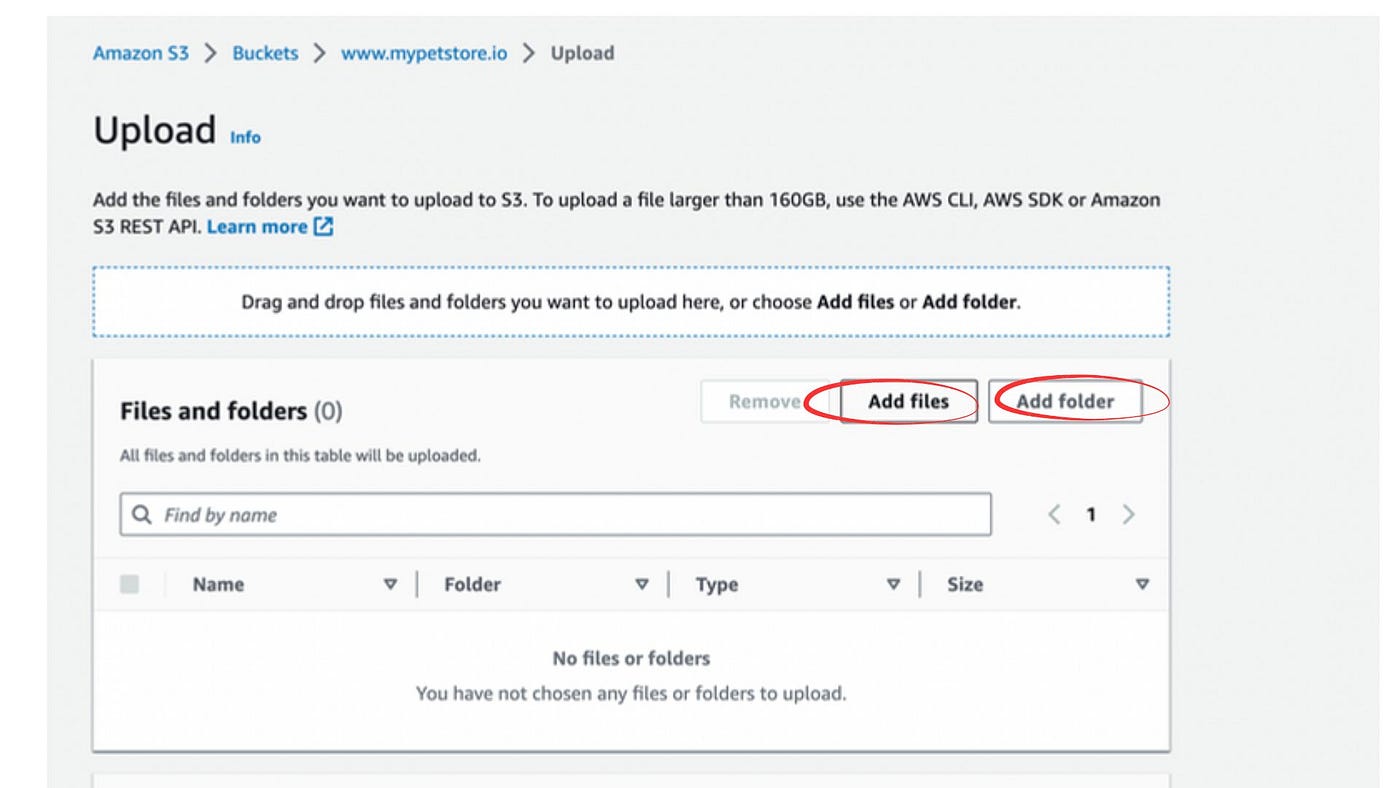
Click on the “Add files” button, highlight all the files in our project build and add them
Next, click on the “Add folder” button and import the “static” folder to S3 bucket.
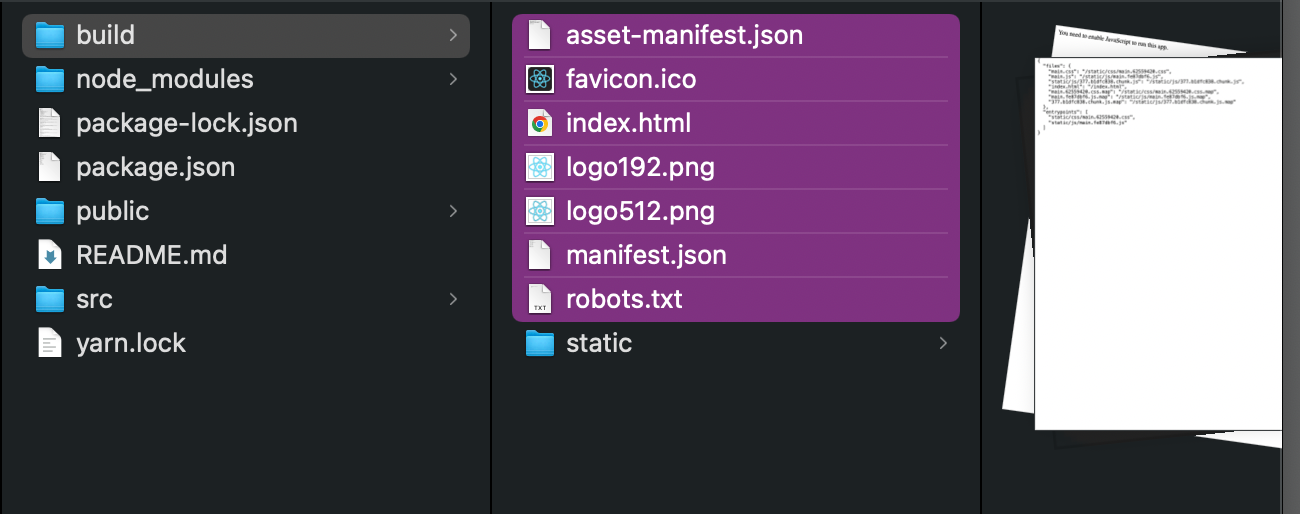
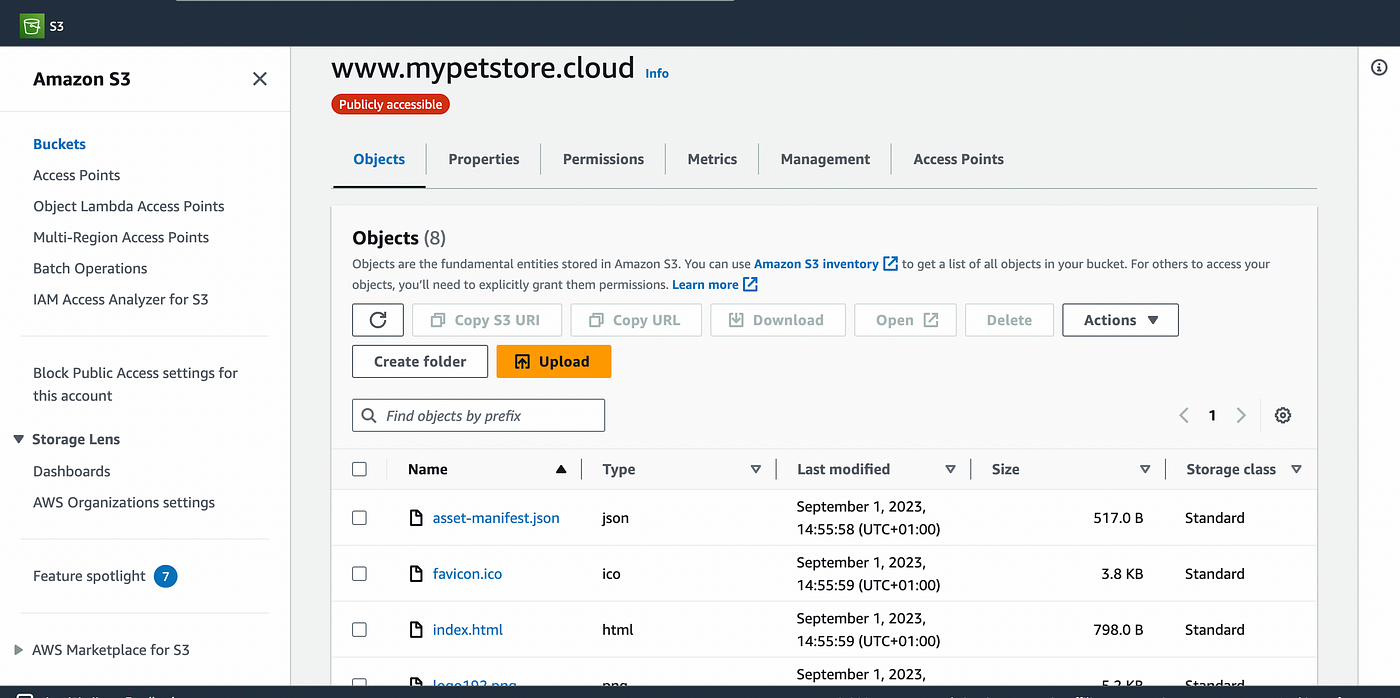
The uploaded data should look like the image below on our S3 bucket.
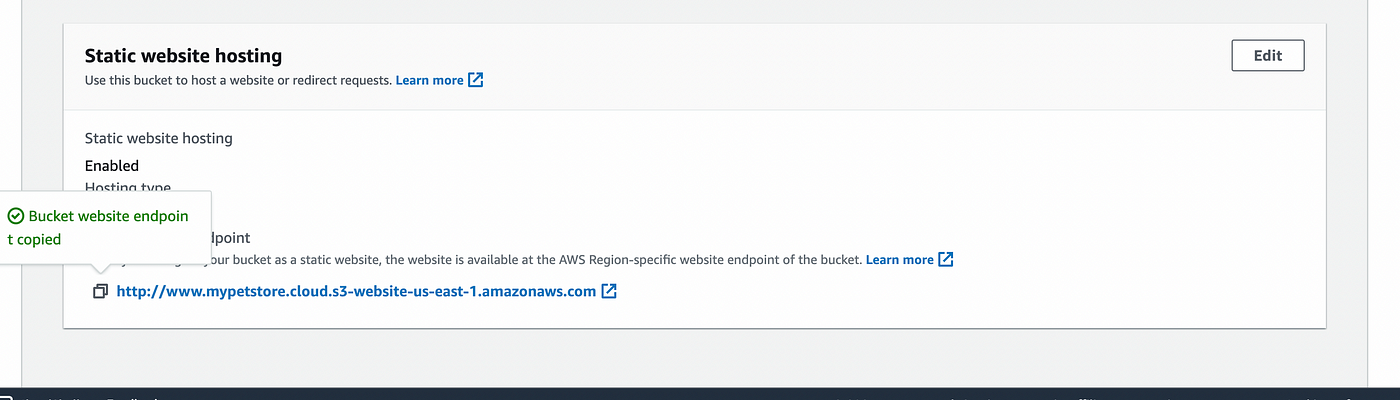
Next, we are going to update the properties of our bucket
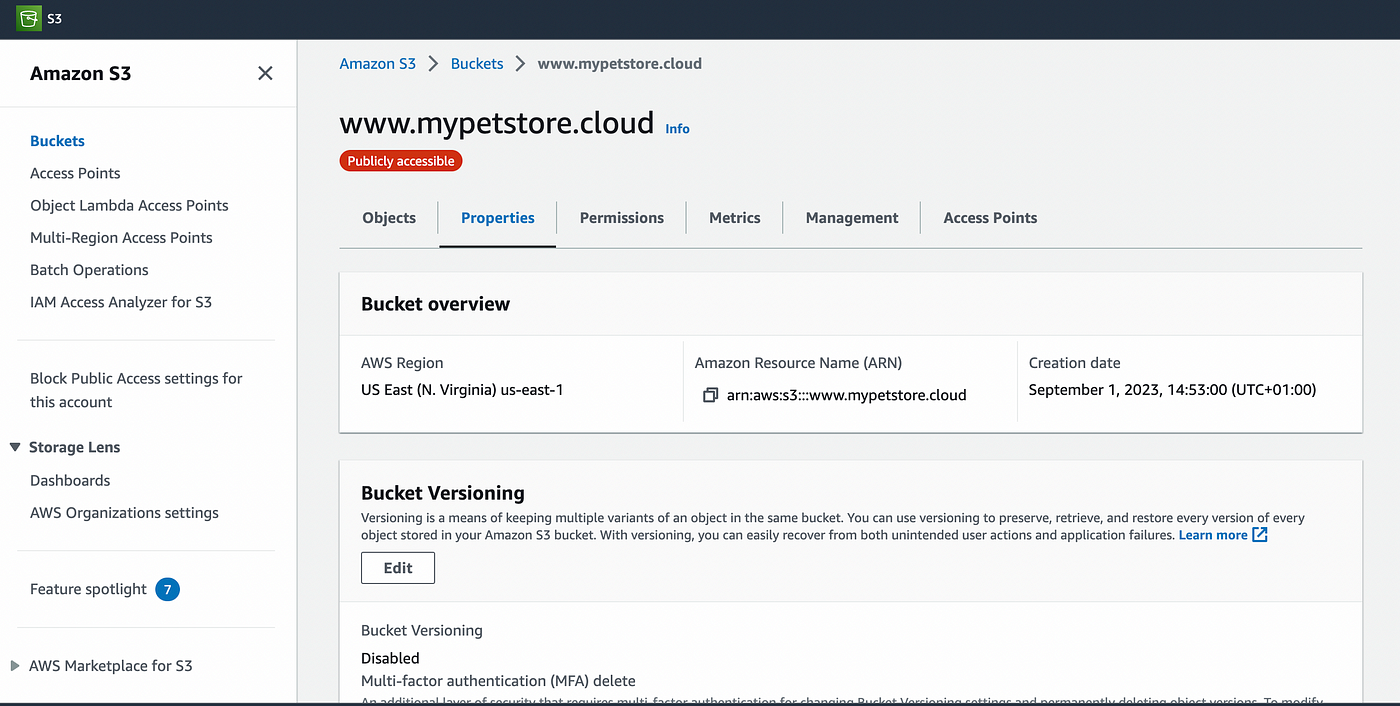
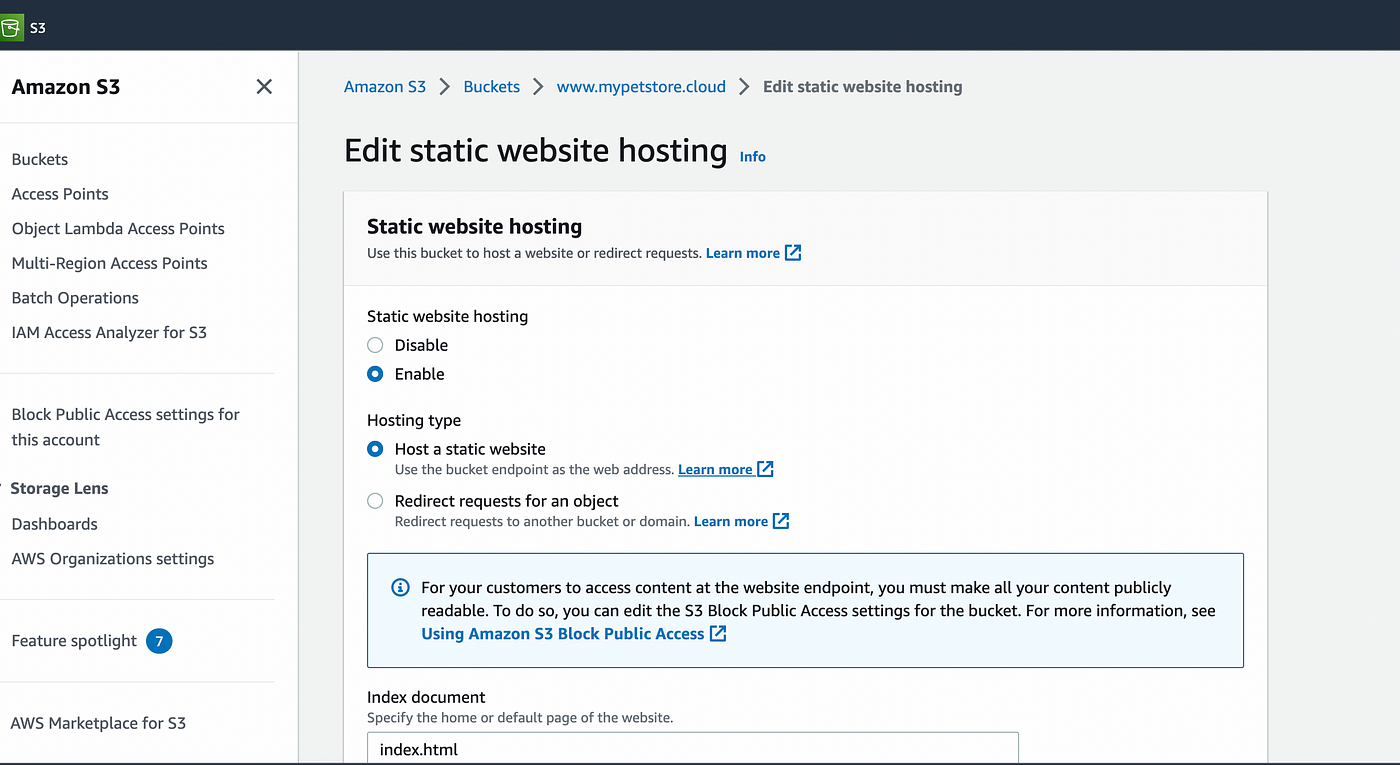
Scroll down to the bottom to the “static website hosting” option and edit it.
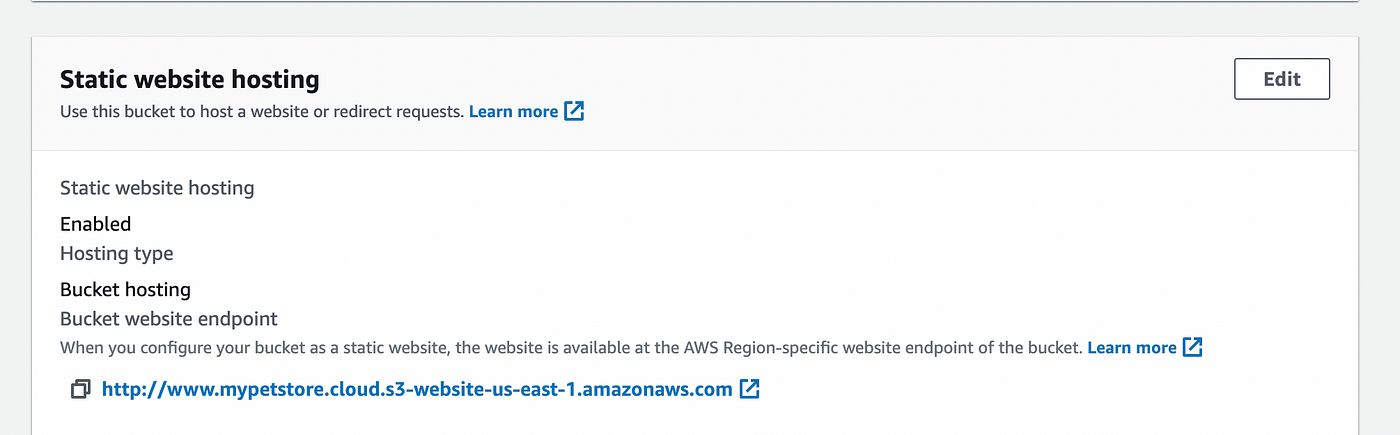
Enable static website hosting for our S3 bucket and specify “index.html” as the default page of your project.
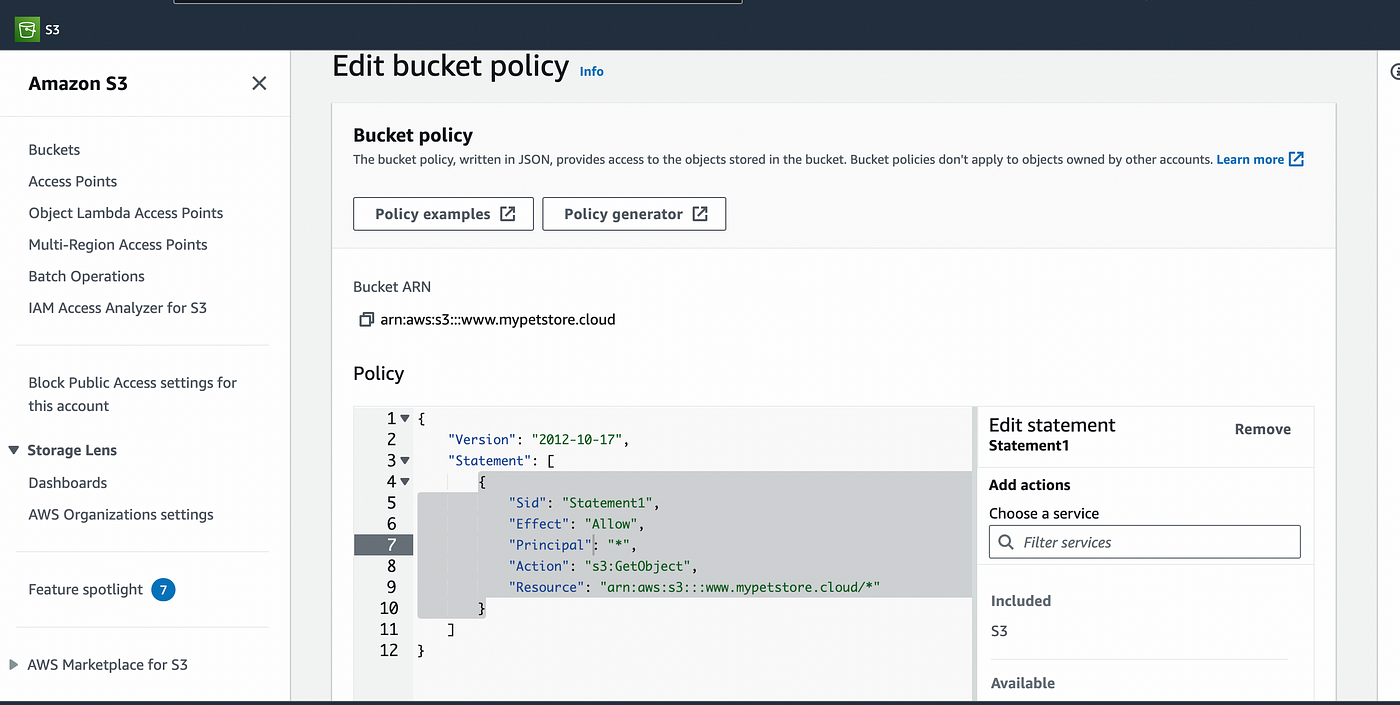
Next, navigate to the the S3 bucket permissions lets update the policies.
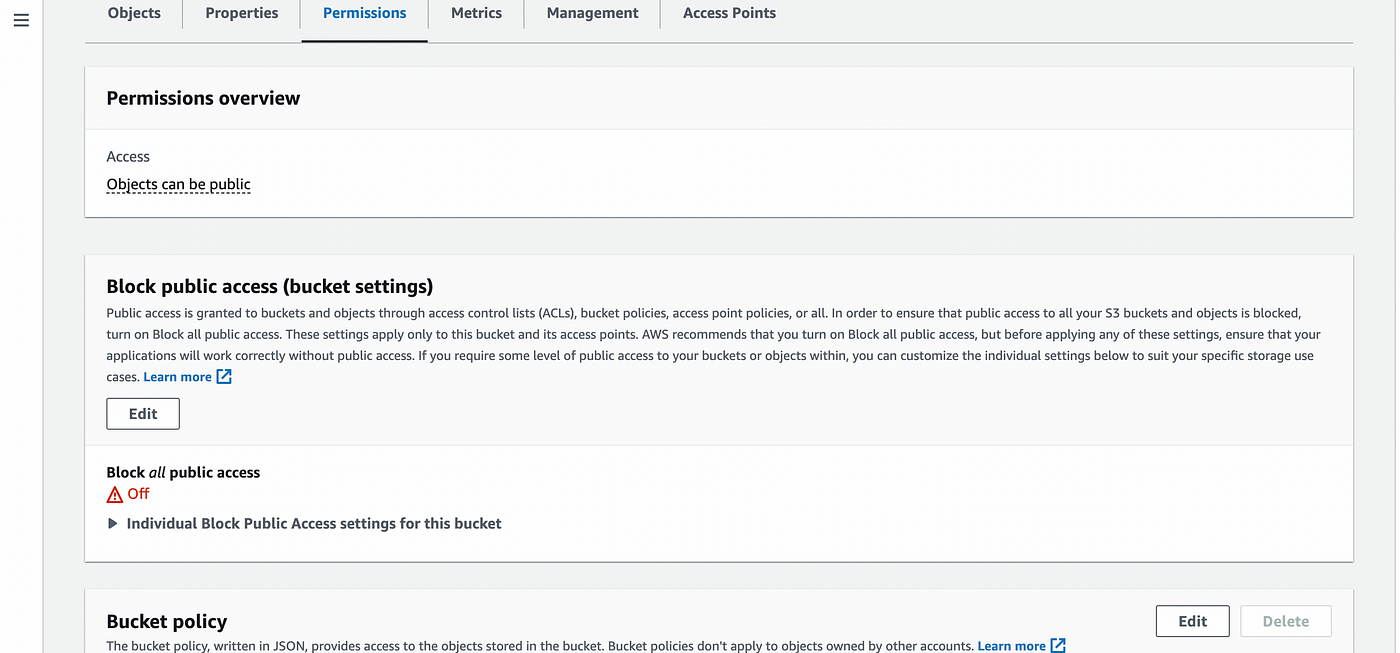
Scroll down to the bucket policy and edit it. Input the following policy configurations.
{
"Version": "2012-10-17",
"Statement": [
{
"Sid": "Statement1",
"Effect": "Allow",
"Principal": "*",
"Action": "s3:GetObject",
"Resource": "arn:aws:s3:::www.mypetstore.cloud/*"
}
]
}
Ensure you replace “resource” with your bucket name.
Once that is completed, navigate to the bucket properties and scroll to the bottom, You will see a URL available for our bucket.

Copy the link and paste it into a browser.
Your React app should be able to load in the browser like this.
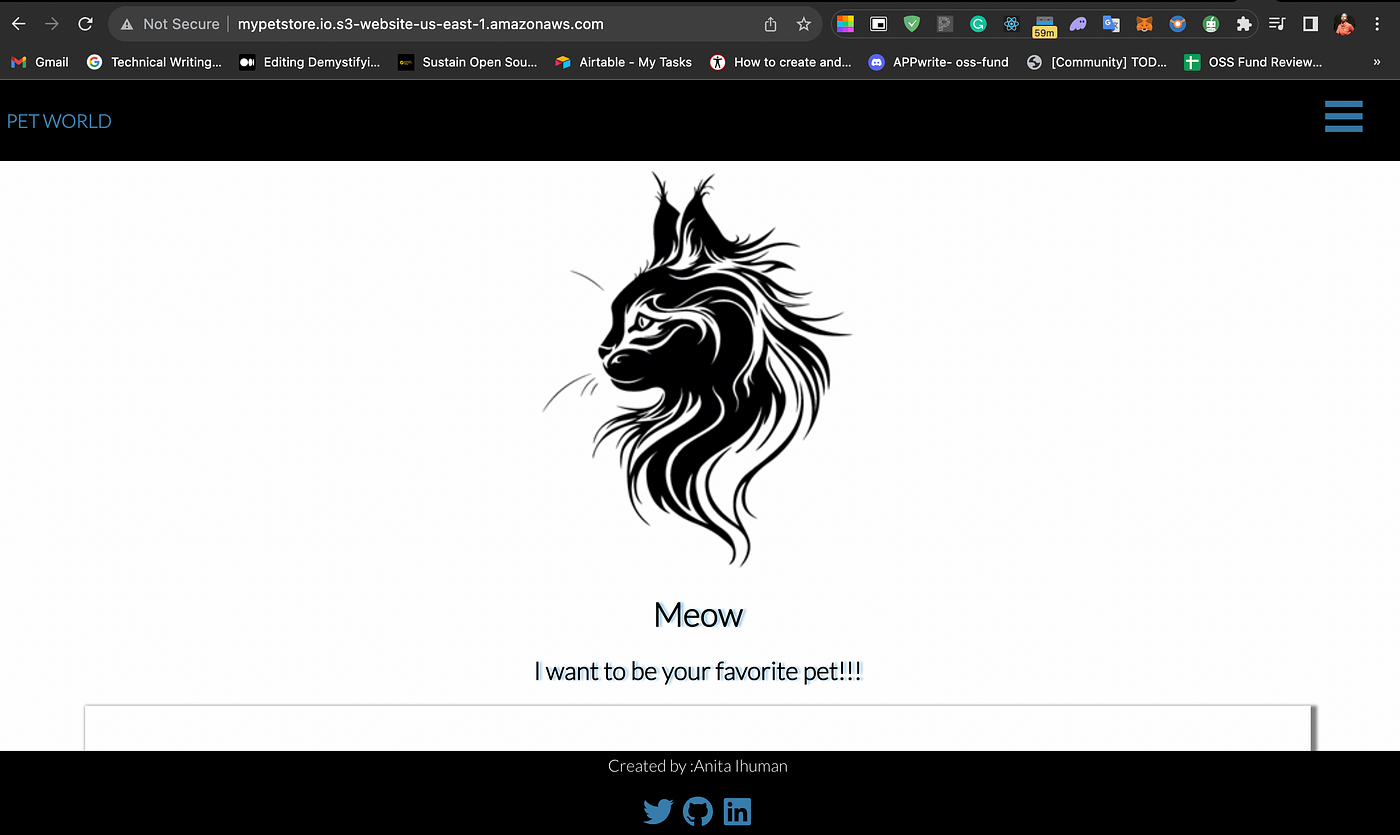
Cool, now we have successfully deployed our React App to an AWS S3 Bucket.
Setup a Domain for S3 Static Website
For the next step, we are going to set up a custom domain name for our React App using any domain name register. For the purpose of this tutorial, I will be using Godaddy.
You will need to take a moment to purchase a domain name for this part of the demo.
I purchased a domain name called “mypetstore.cloud” which matches the S3 bucket we created.
Next, navigate to the “DNS” configuration setting.
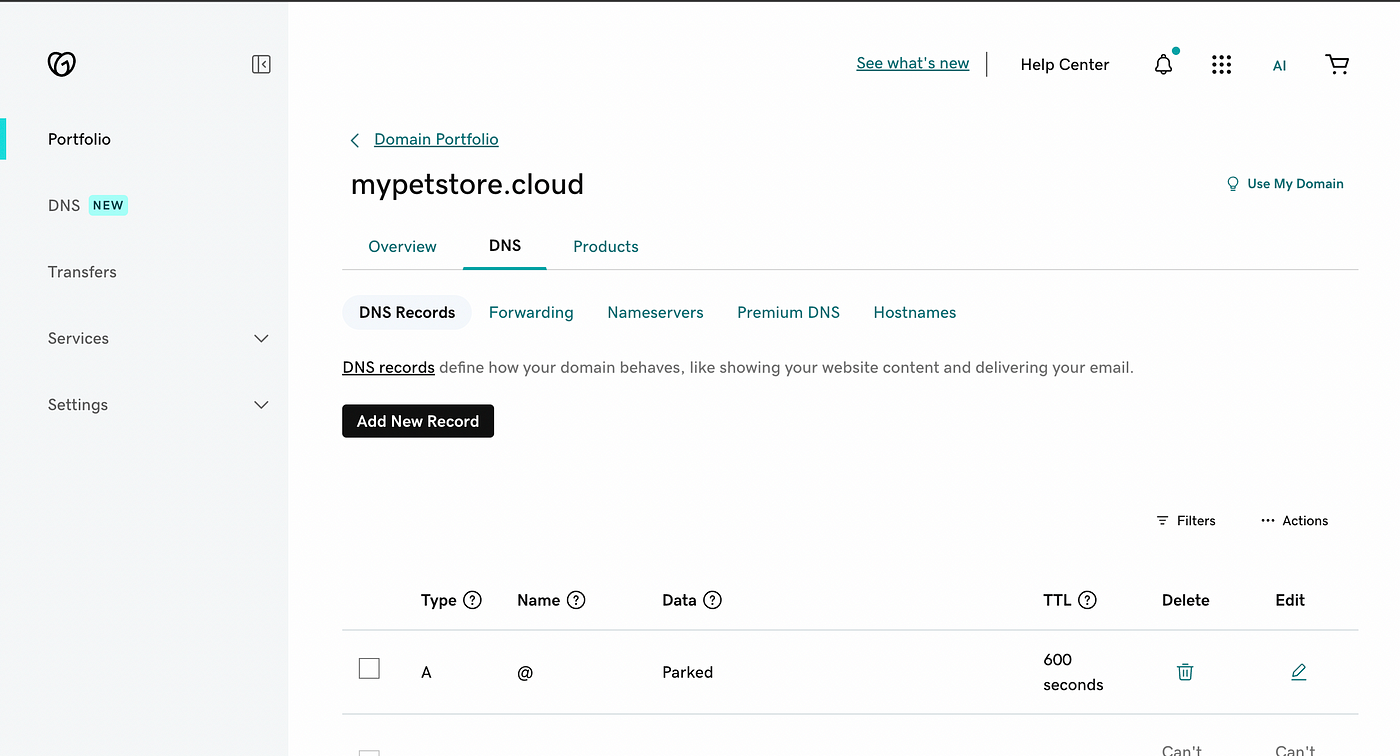
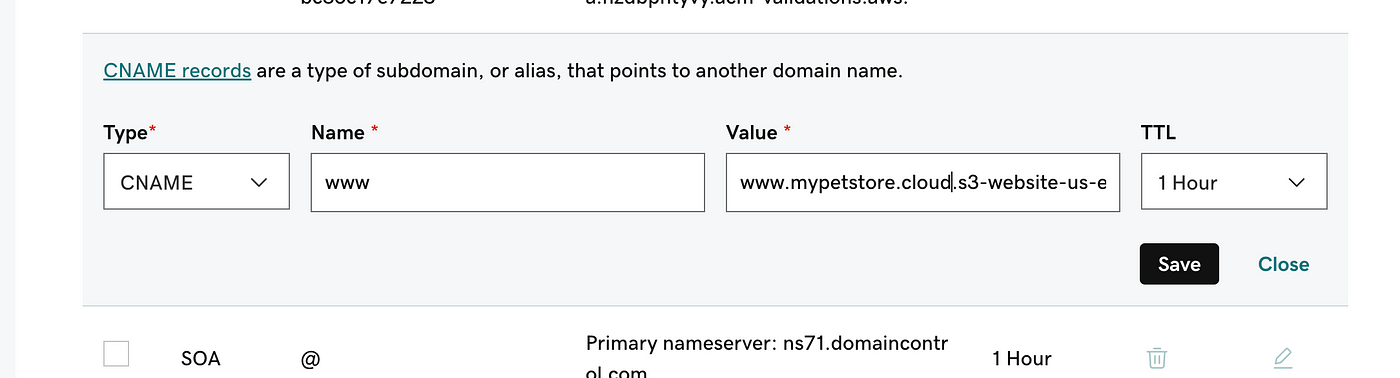
Select the CNAME record available and edit it.
Replace the “value” with the url link of our S3 bucket and the name with the name of our S3 bucket.
Save the updates.
Great! Now let's head back to AWS.
Deploy React App to CloudFront
We need to create a CDN that will speed up the distribution of our website content by routing user requests through the AWS network.
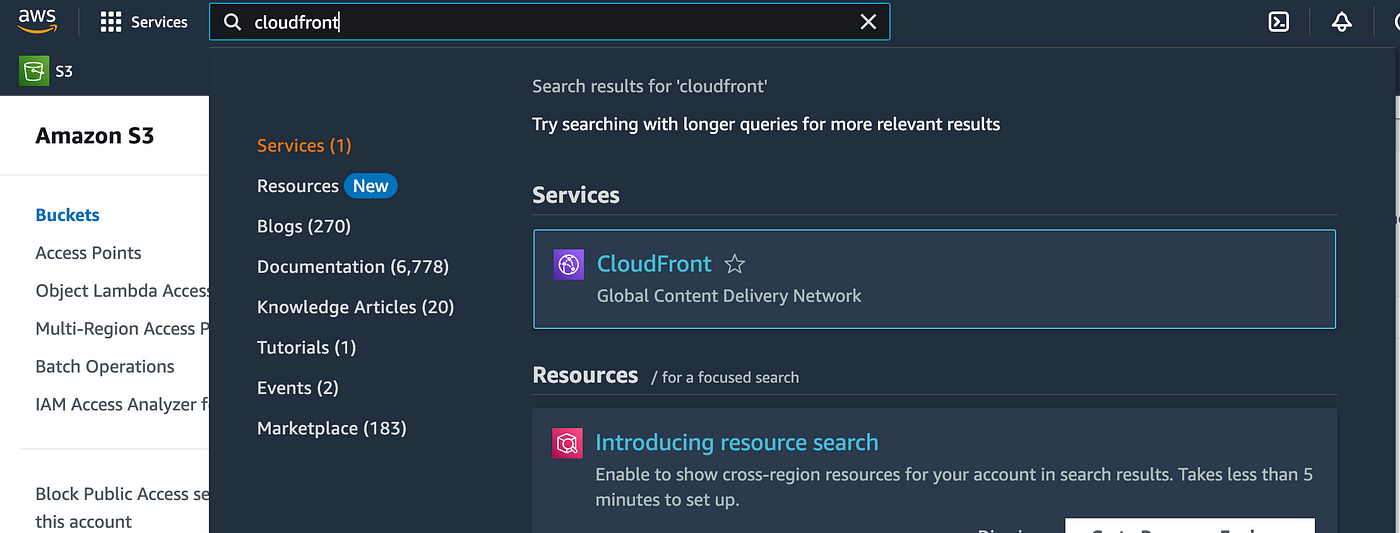
Search for Cloudfront in the AWS console.
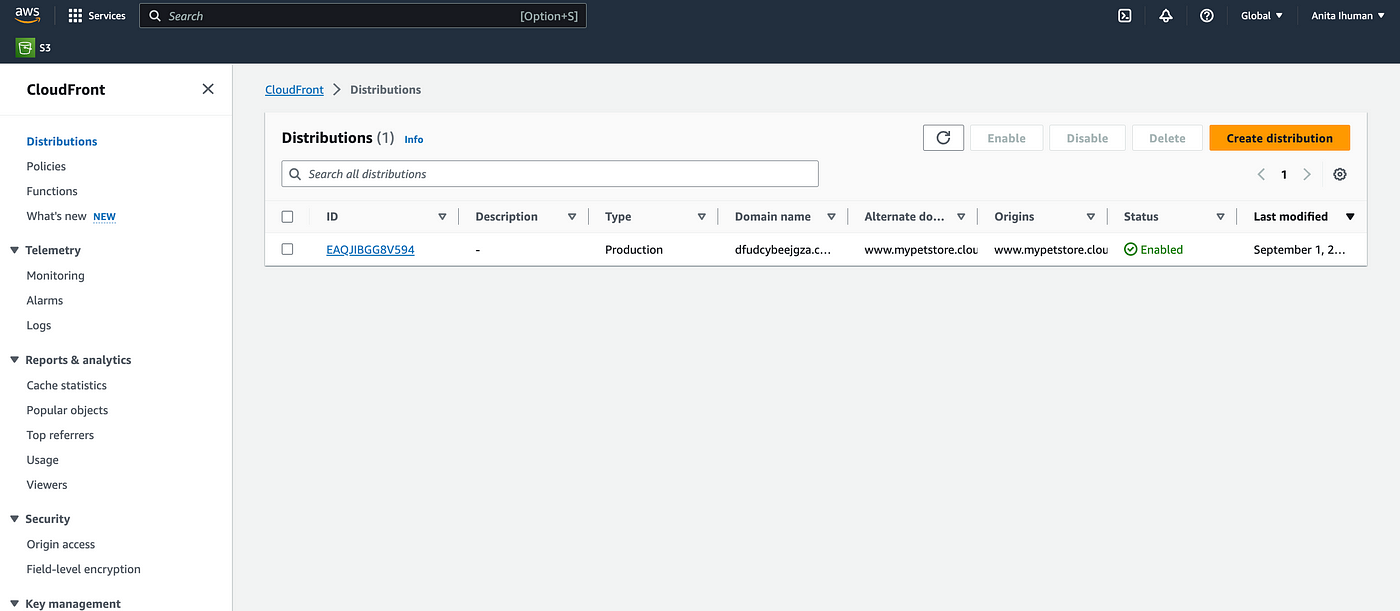
Select “Create distribution” button
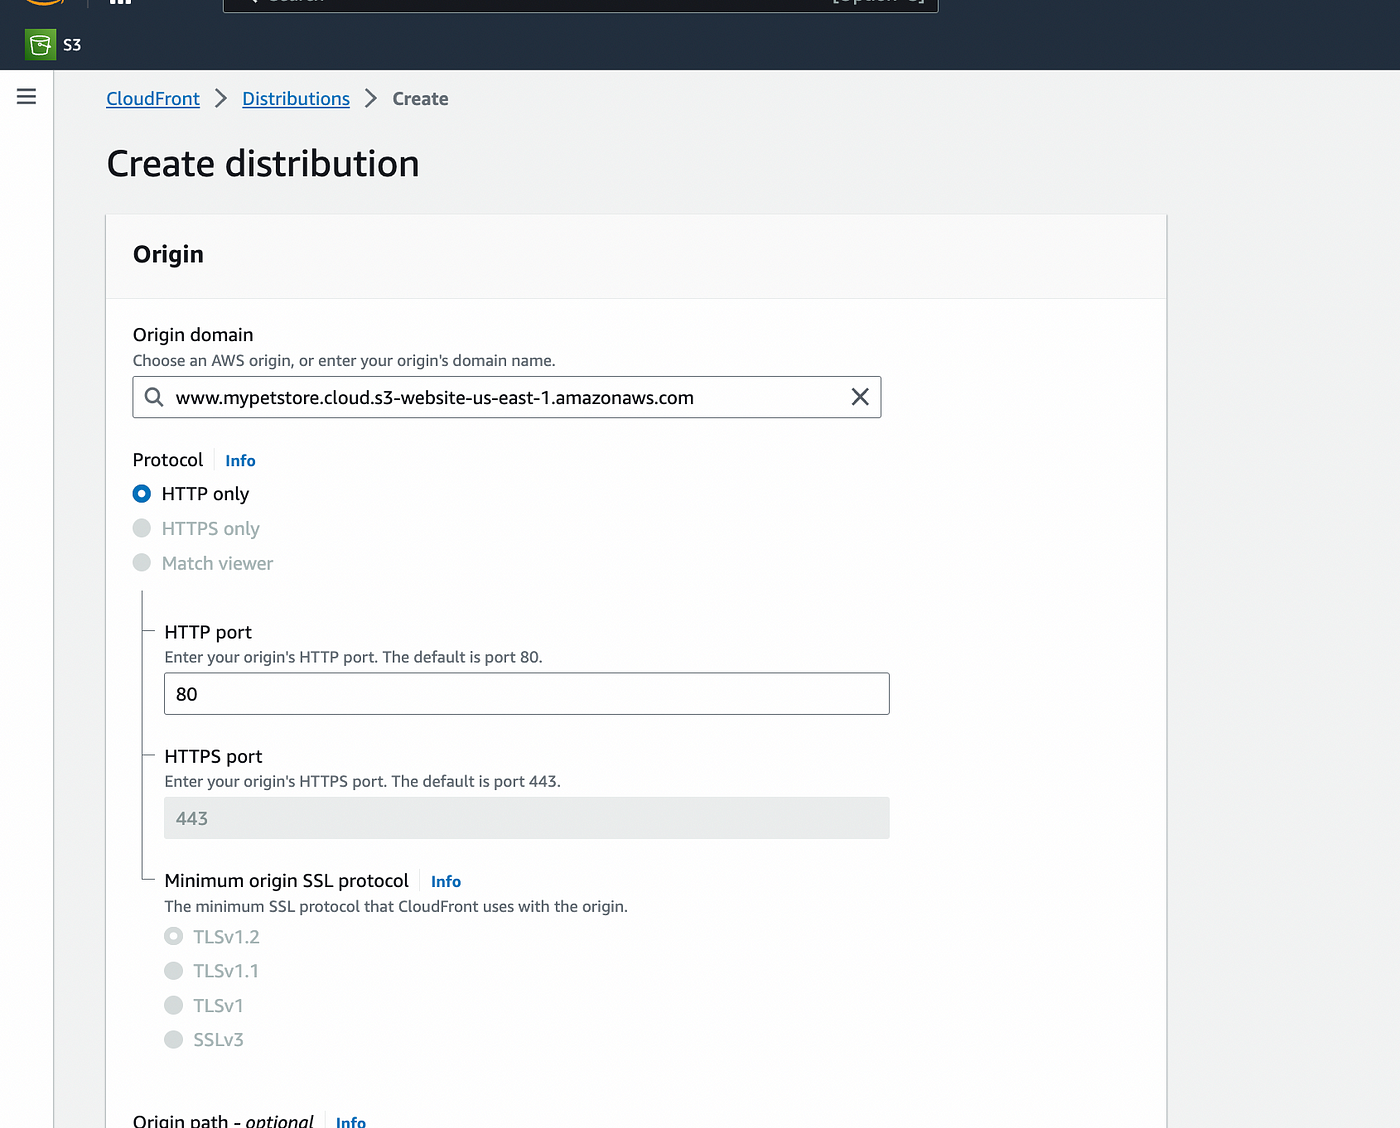
Input the URL link to our S3 bucket under the origin domain
You can leave the other options as the default.
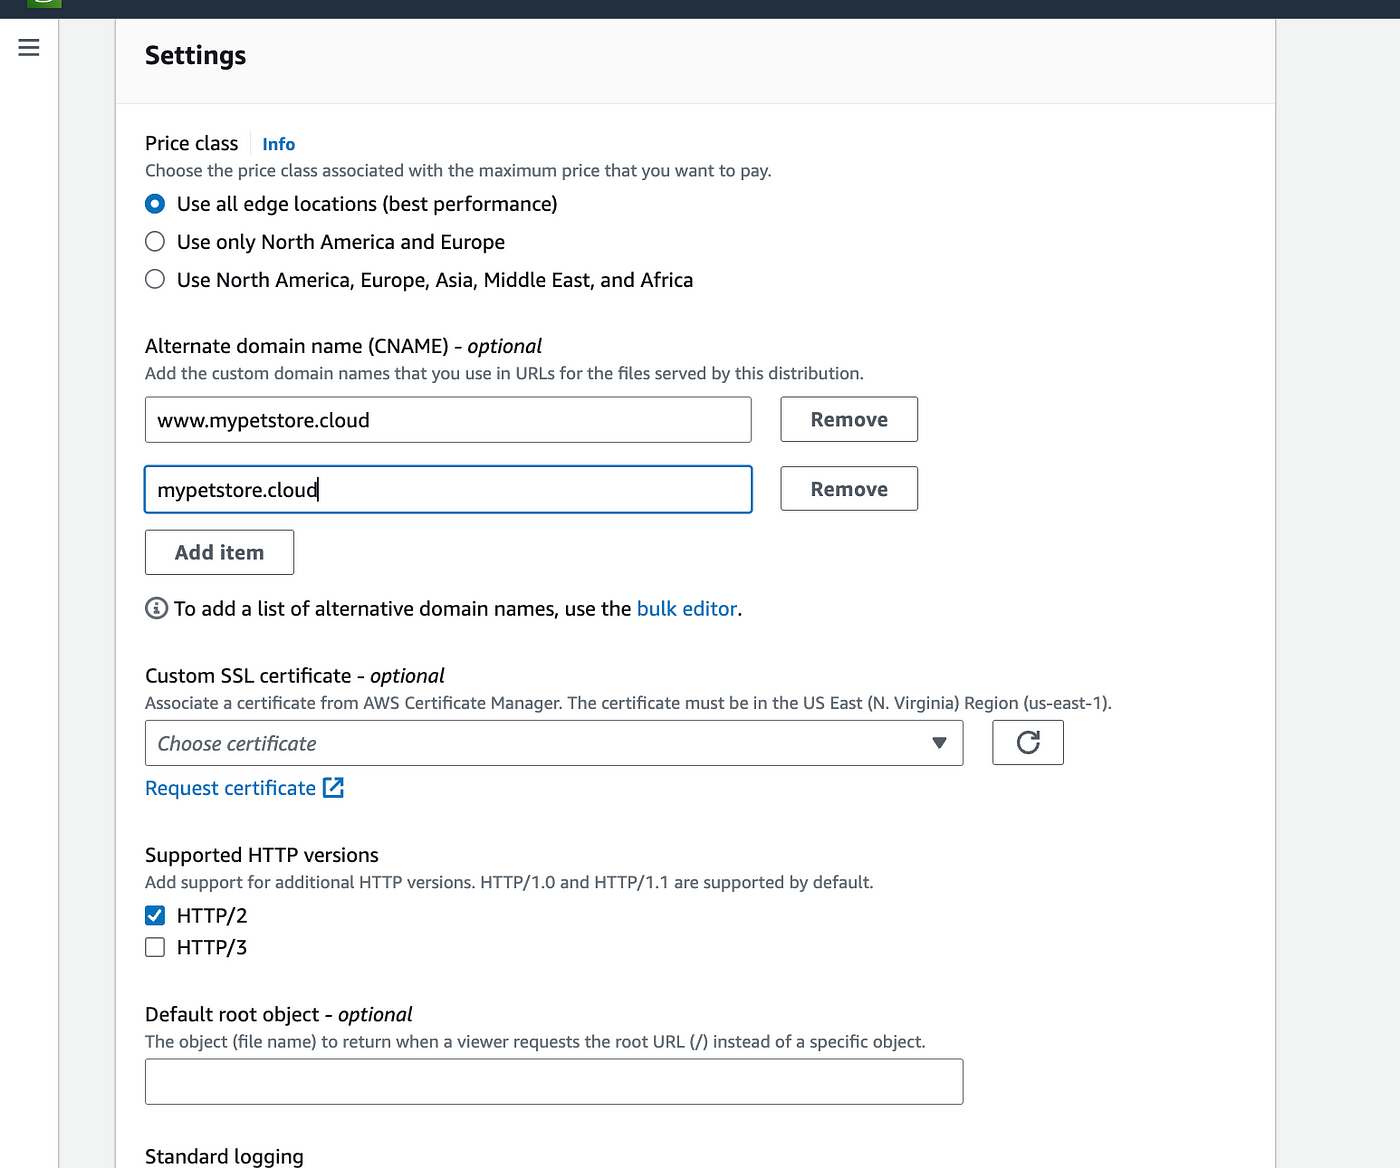
Scroll to the bottom of the page under setting and input the CNAME
I will be using the root domain name and www subdomain name: “www.mypetstore.cloud” and “mypetstore.cloud”
Since we want to use HTTPS for this project, we will need to add a certificate
So, proceed to the “Request certificate” link just below that.

On the certificate page, you will need to fill in the root domain name and www subdomain names we just specified above.
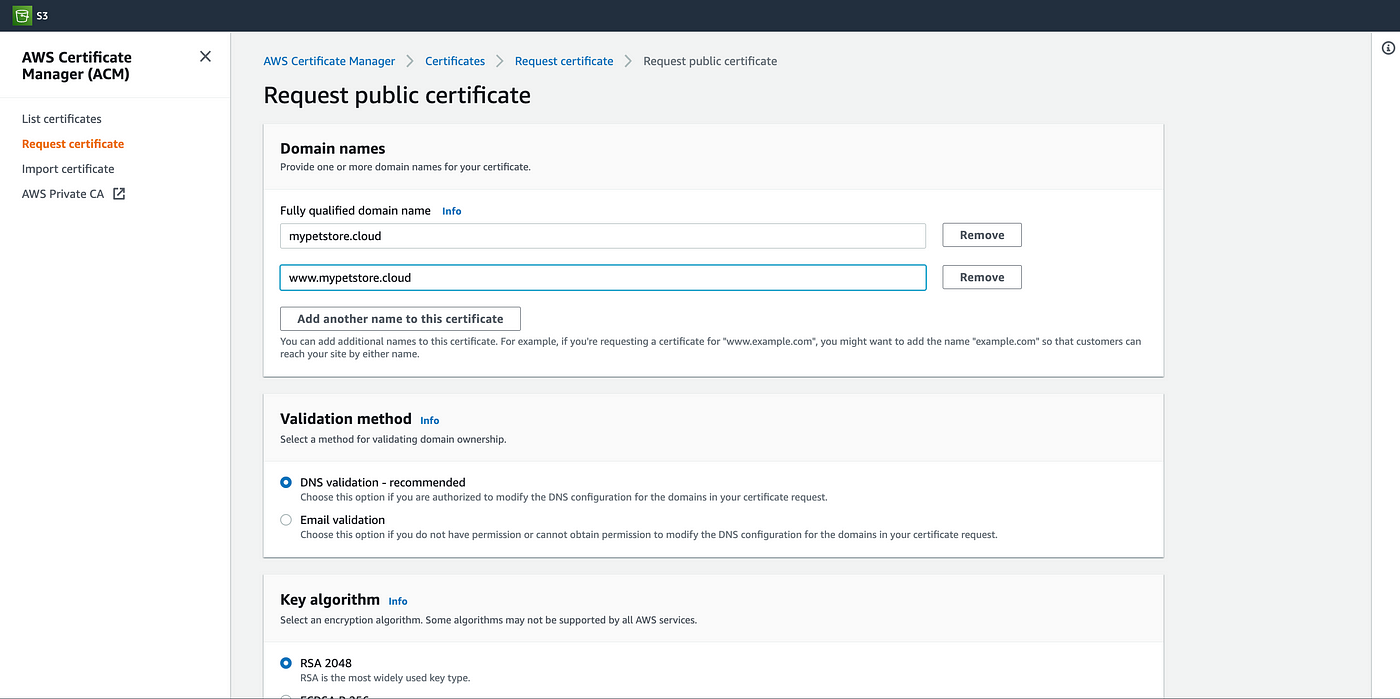
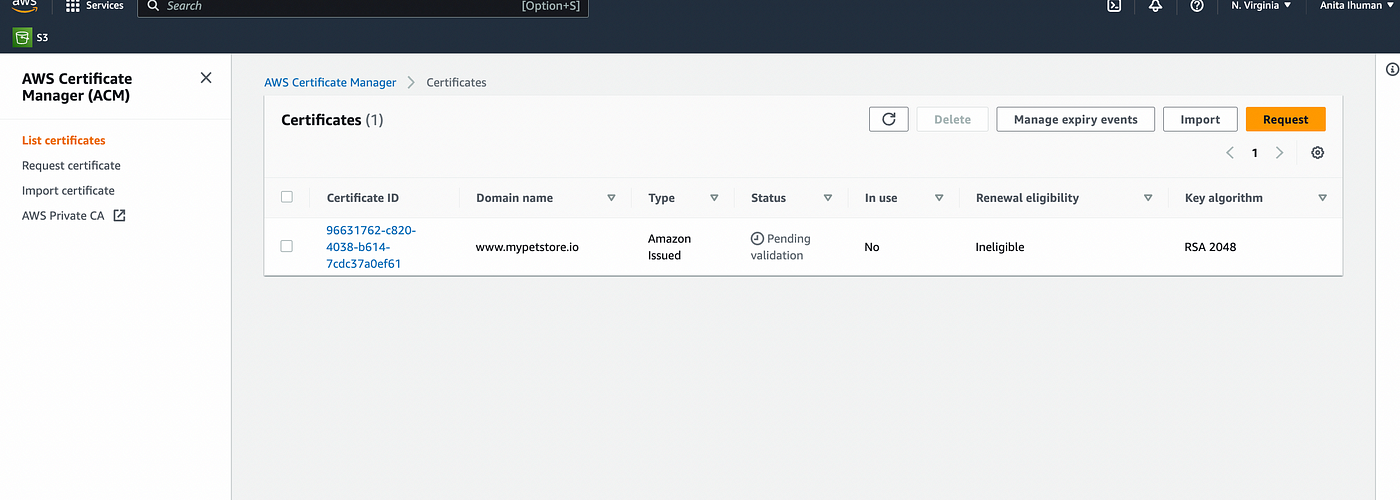
Proceed to request the certificate. That should specify that it has been successfully created but the status will indicate “ Pending validation”
Now, let's go back to our domain register (Godaddy) and create two new DNS records( for the root domain name and www subdomain name) and specify the types as CNAME.
Now back to Certificate Manager and into the certificate we just created: Copy the “CNAME names” for the individual domains, just like I did below.
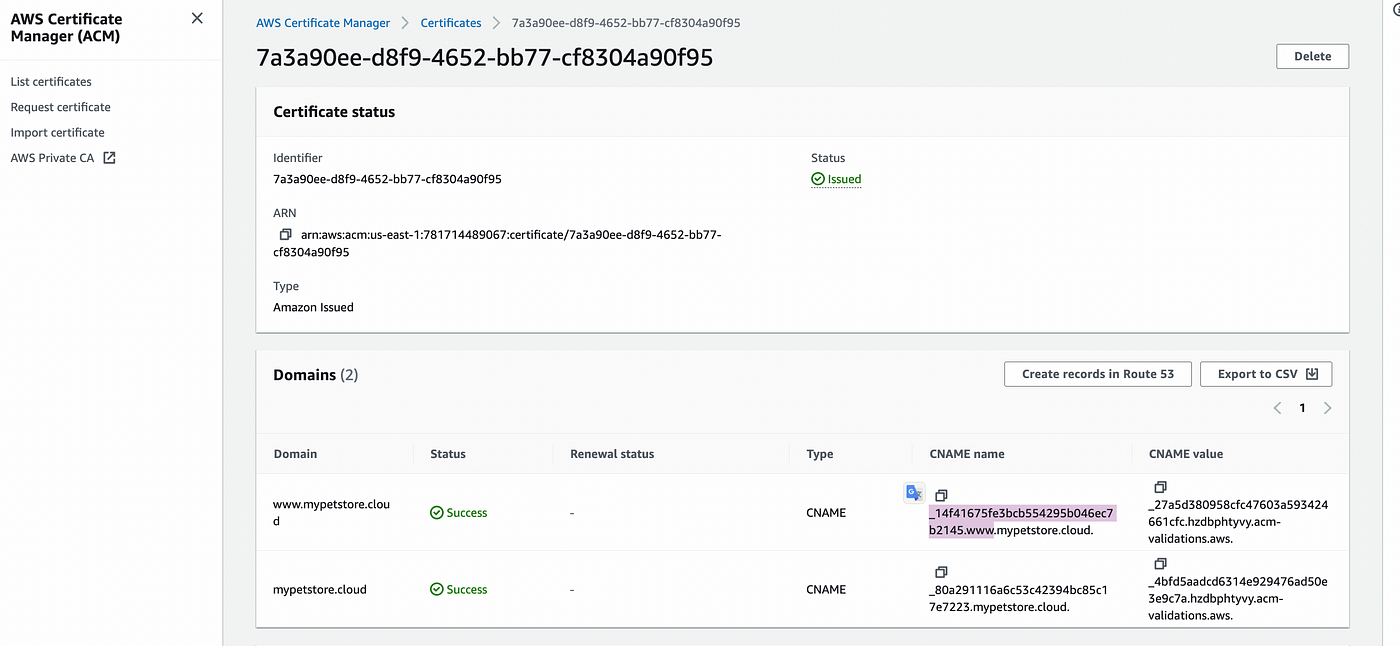
Navigate to our domain register and replace the name of the new CNAME DNS records we just created with the CNAME we just copied.
Copy the “CNAME value” as well and replace it with the value of the same CNAME DNS record created in the domain register.
Repeat this for both the root domain name and www subdomain name

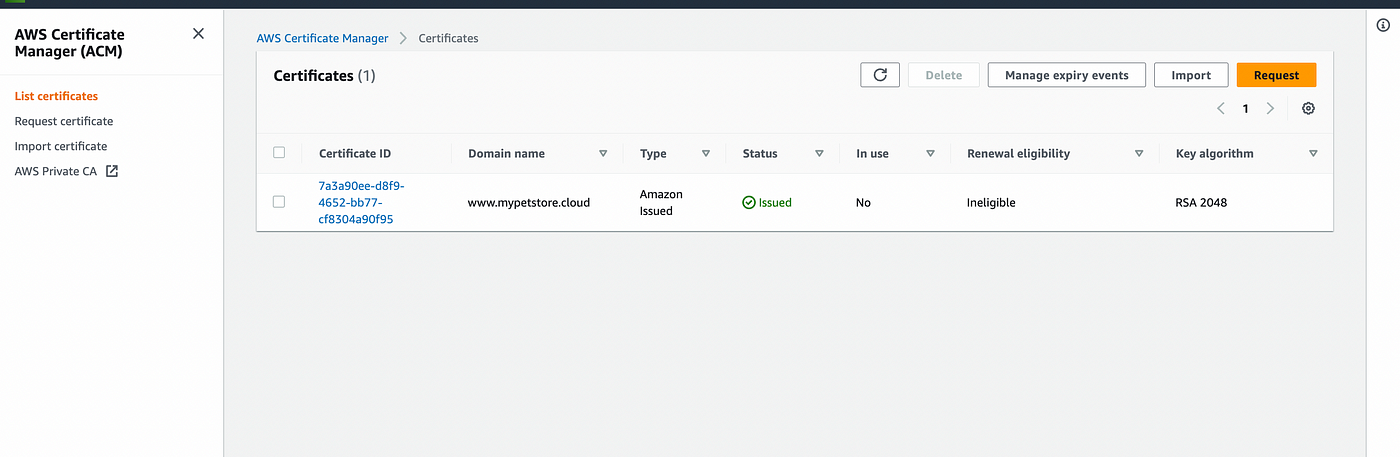
Now refresh the certificate manager page. Our certificate should indicate “Issued” as the status.
Navigate back to CloudFront, and now you should have the option to choose the certificate we just created.
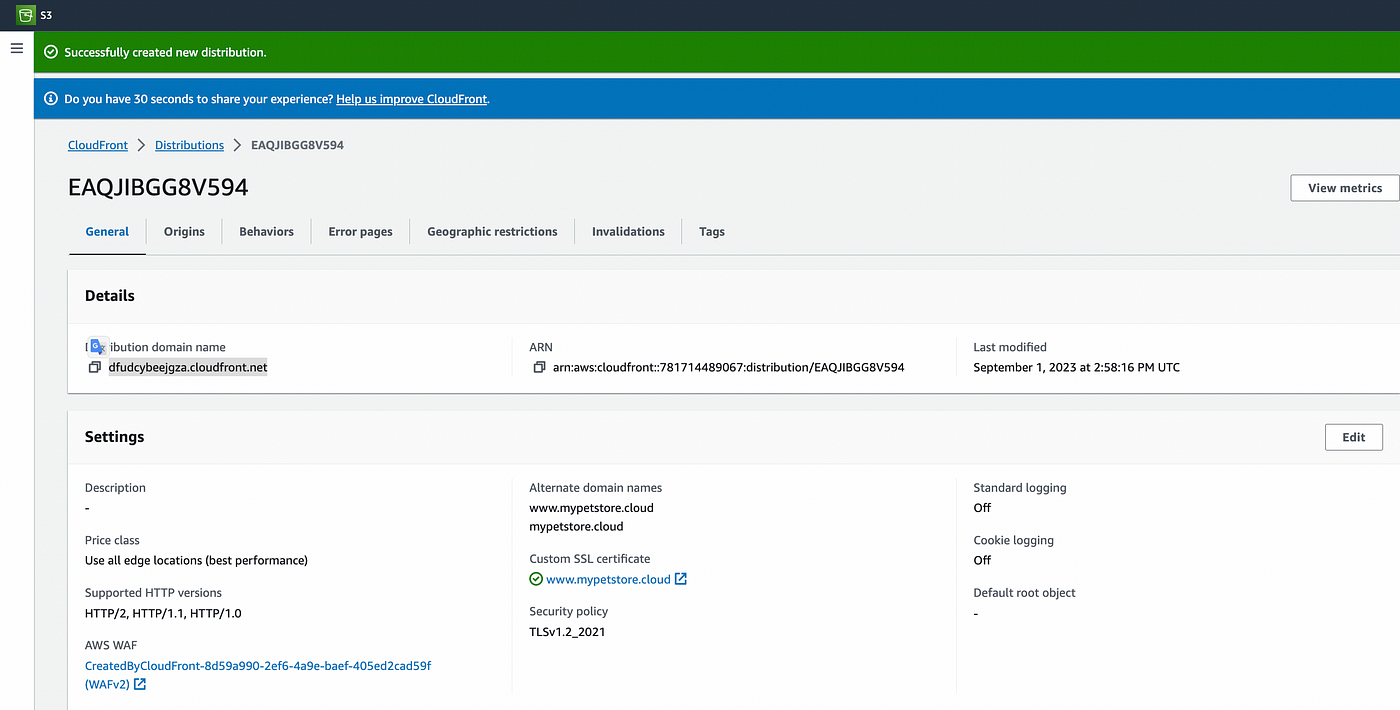
Once that is in place, you can go ahead and create our distribution.
Next, navigate to our just-created CloudFront distribution and copy the distribution domain name to your clipboard.
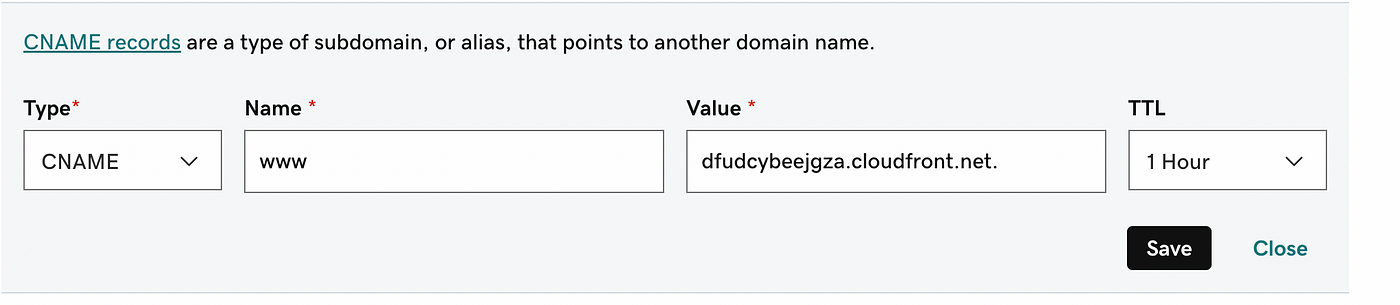
Go back to our domain name register and replace that initial CNAME value we set up with the CloudFront domain name we just copied.
Next, let's confirm that our domain name has been connected to our AWS CloudFront distribution.
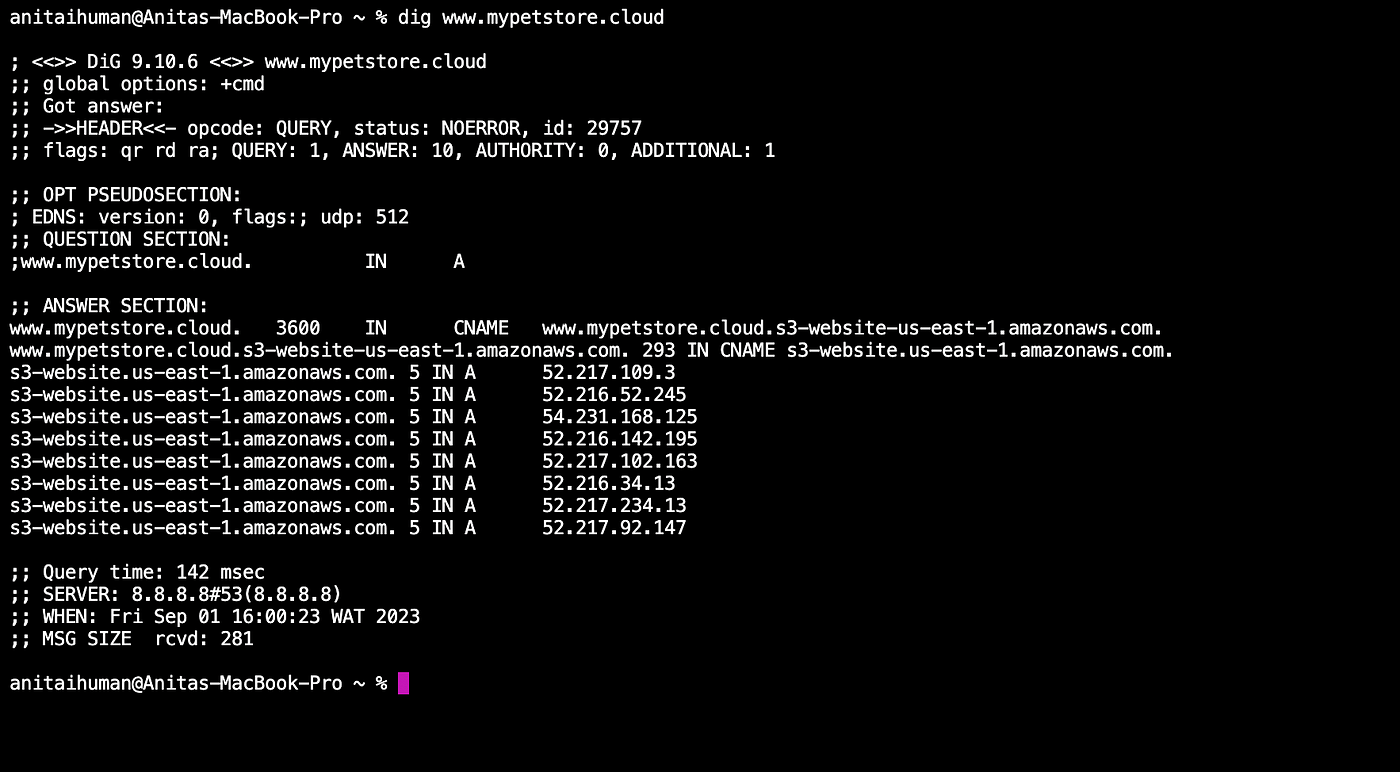
You can also run the domain name in your browser to verify that it still works.
You can also try using HTTPS in the browser instead of http, and it should still load.
Awesome! As seen in the above image, we can now load the website with our specified domain name.
Transfer Domain to Route 53
Next, we need to transfer our domain to Route 53 in order to simplify the management of your domain and DNS settings and enhance the reliability and security of your application.
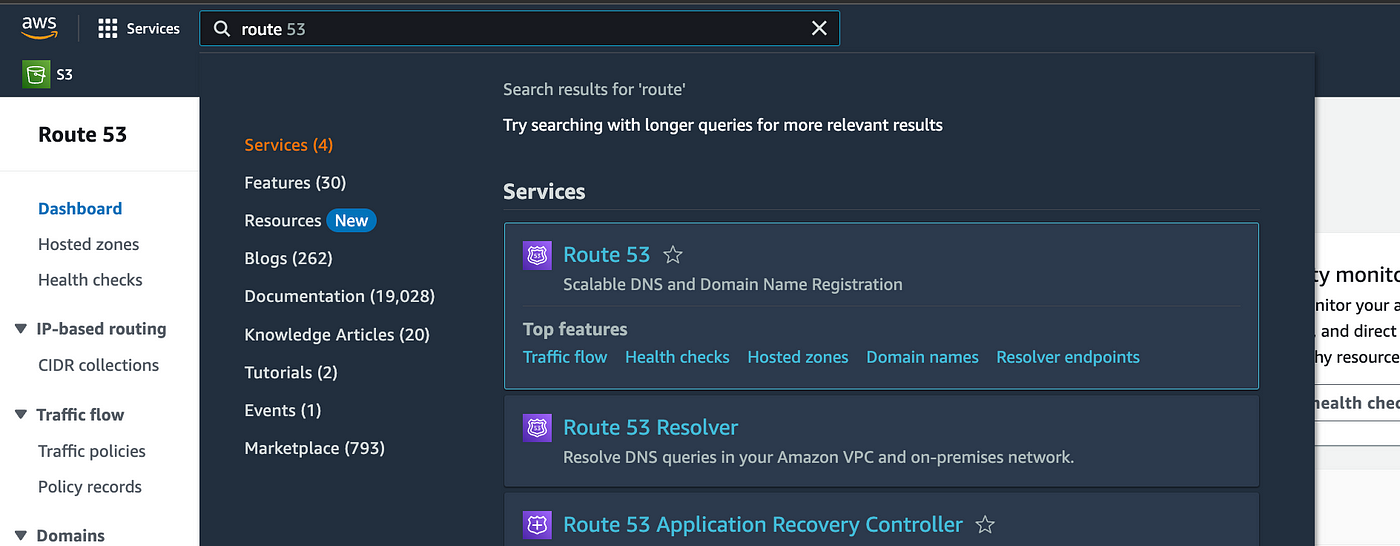
Back in your AWS console, search for Route 53.
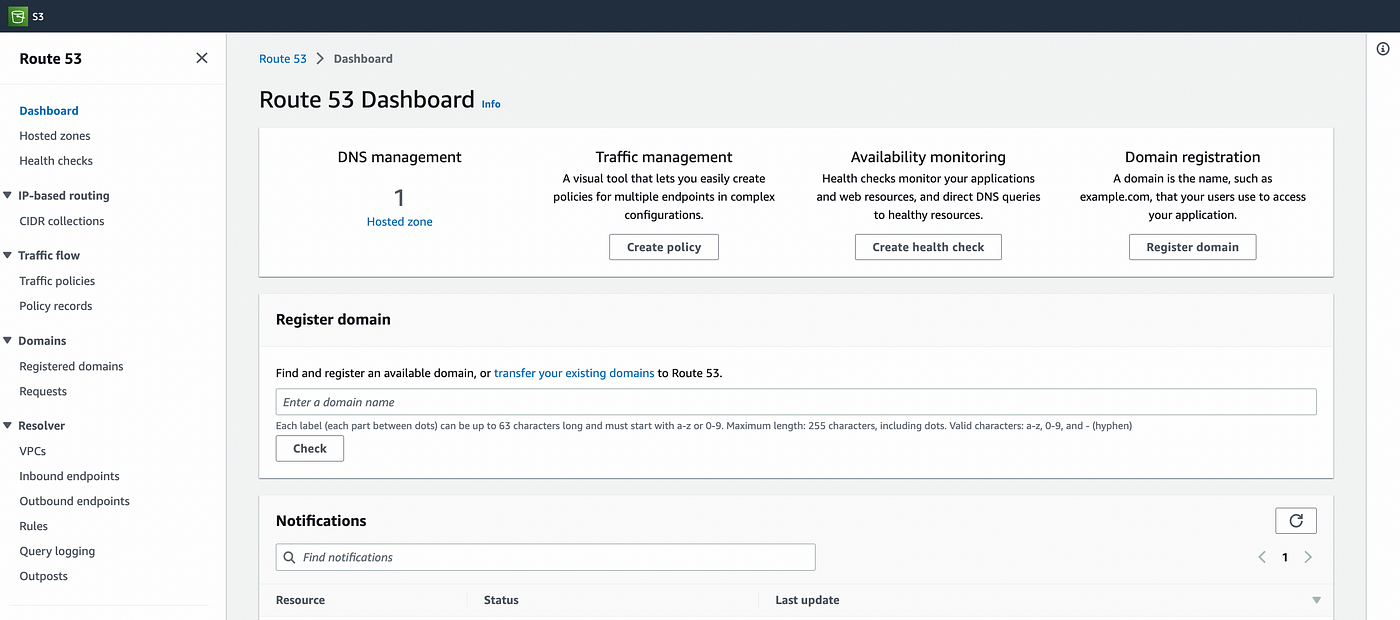
Select on the hosted zones and then select the “create hosted zone”
Input the domain name that we want to route traffic to with a short description.
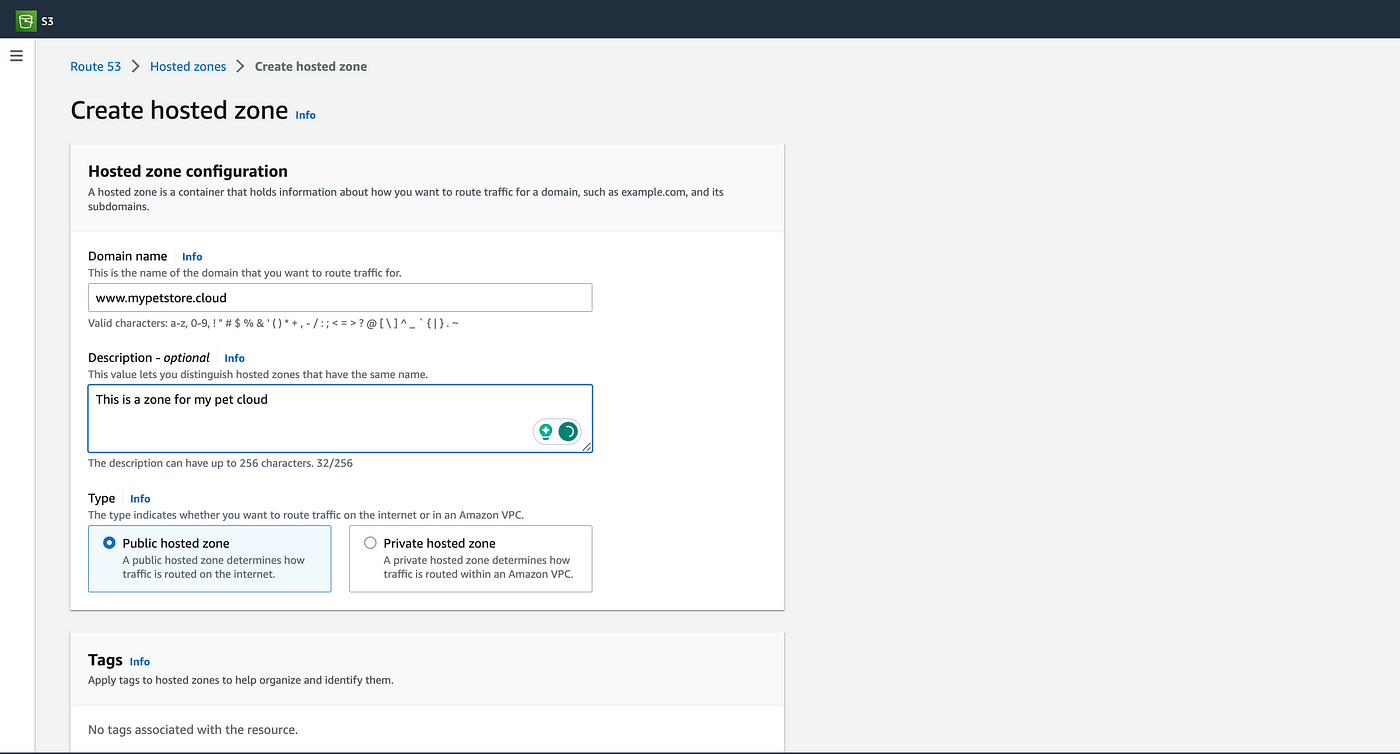
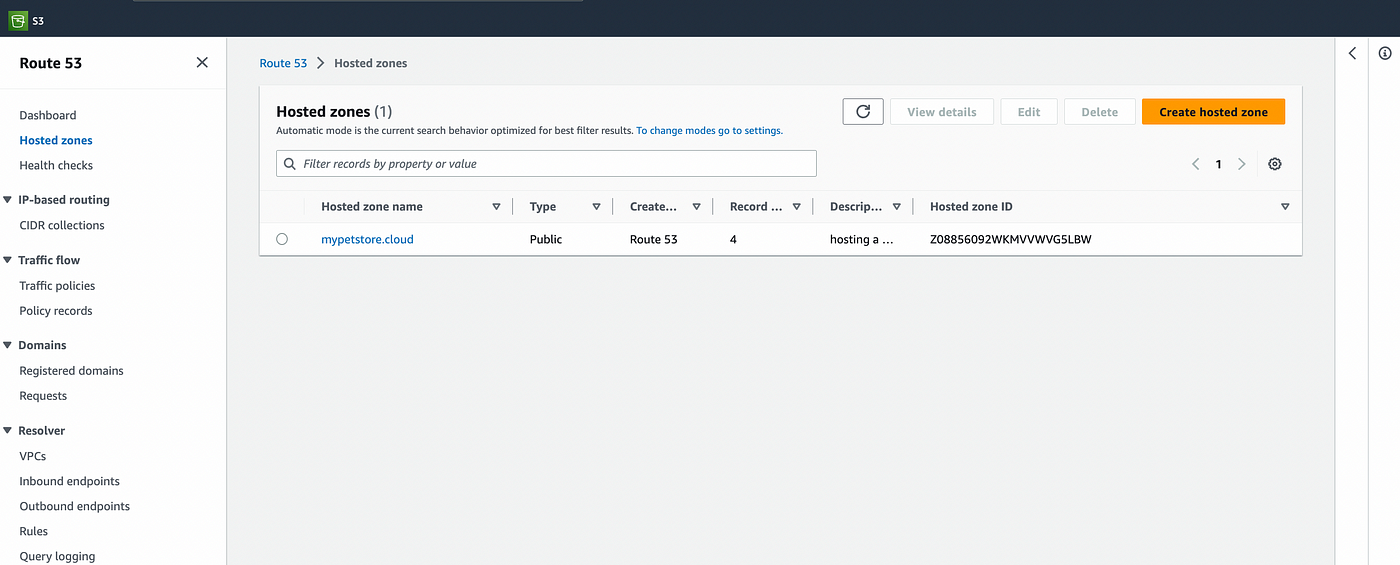
Once you have completed the steps, create the zone, and you should get an image similar to this one below.
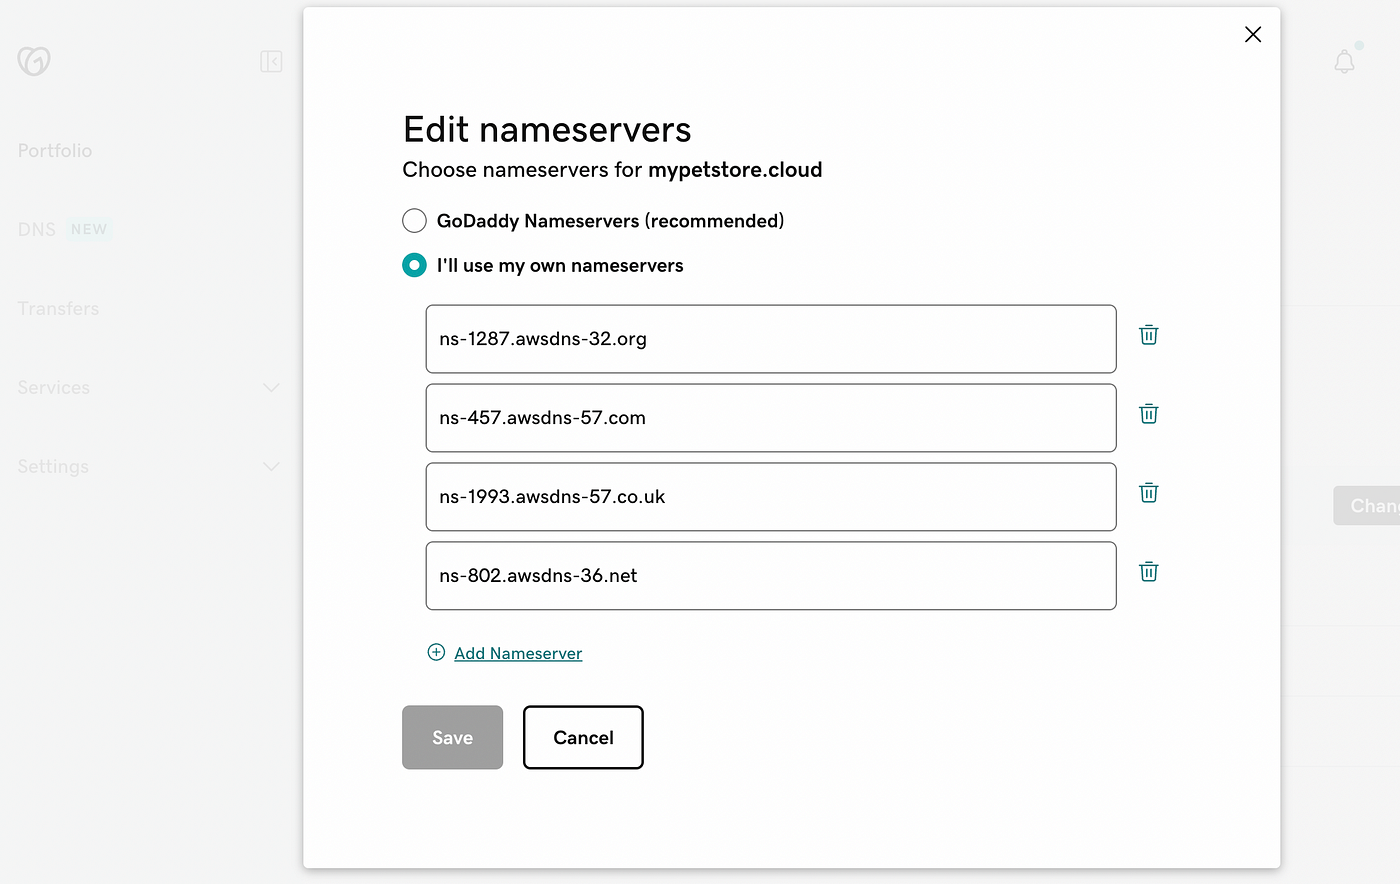
Navigate to our domain register and create a custom nameserver, by selecting “Change nameservers.”
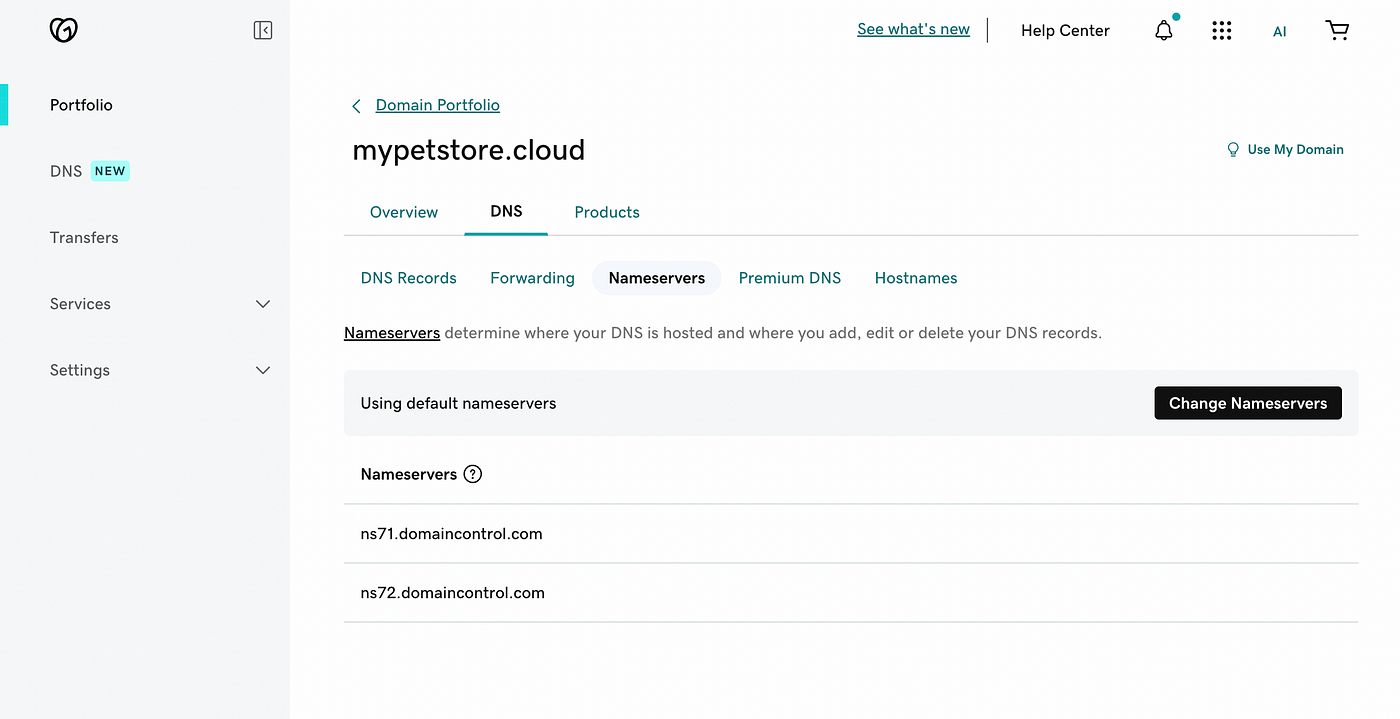
Back in Route 53, we will need to copy these nameservers for routing traffic and replace them with the domain registers nameservers.
Input the nameservers from Route 53 into the custom nameservers, add all four nameservers, and save.
Now let's validate the nameservers.

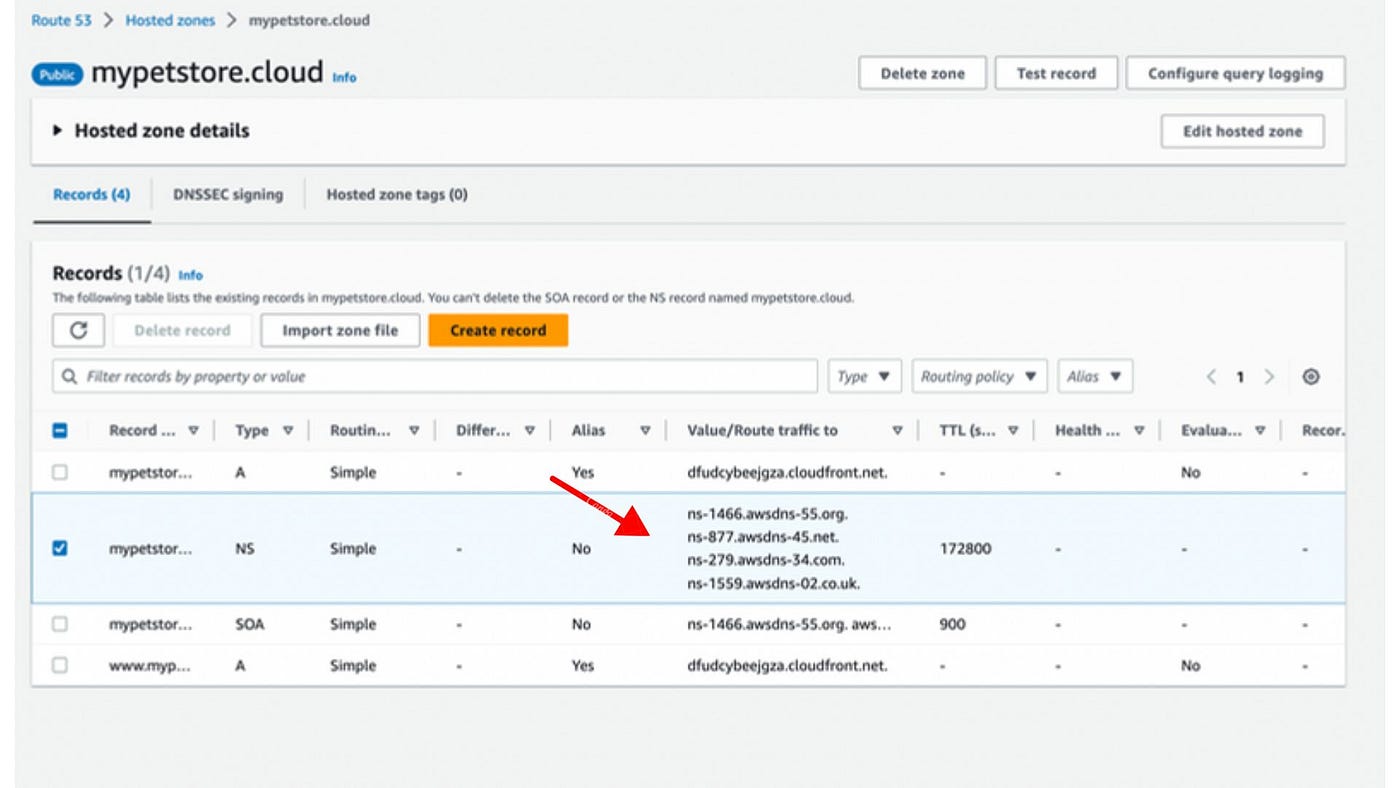
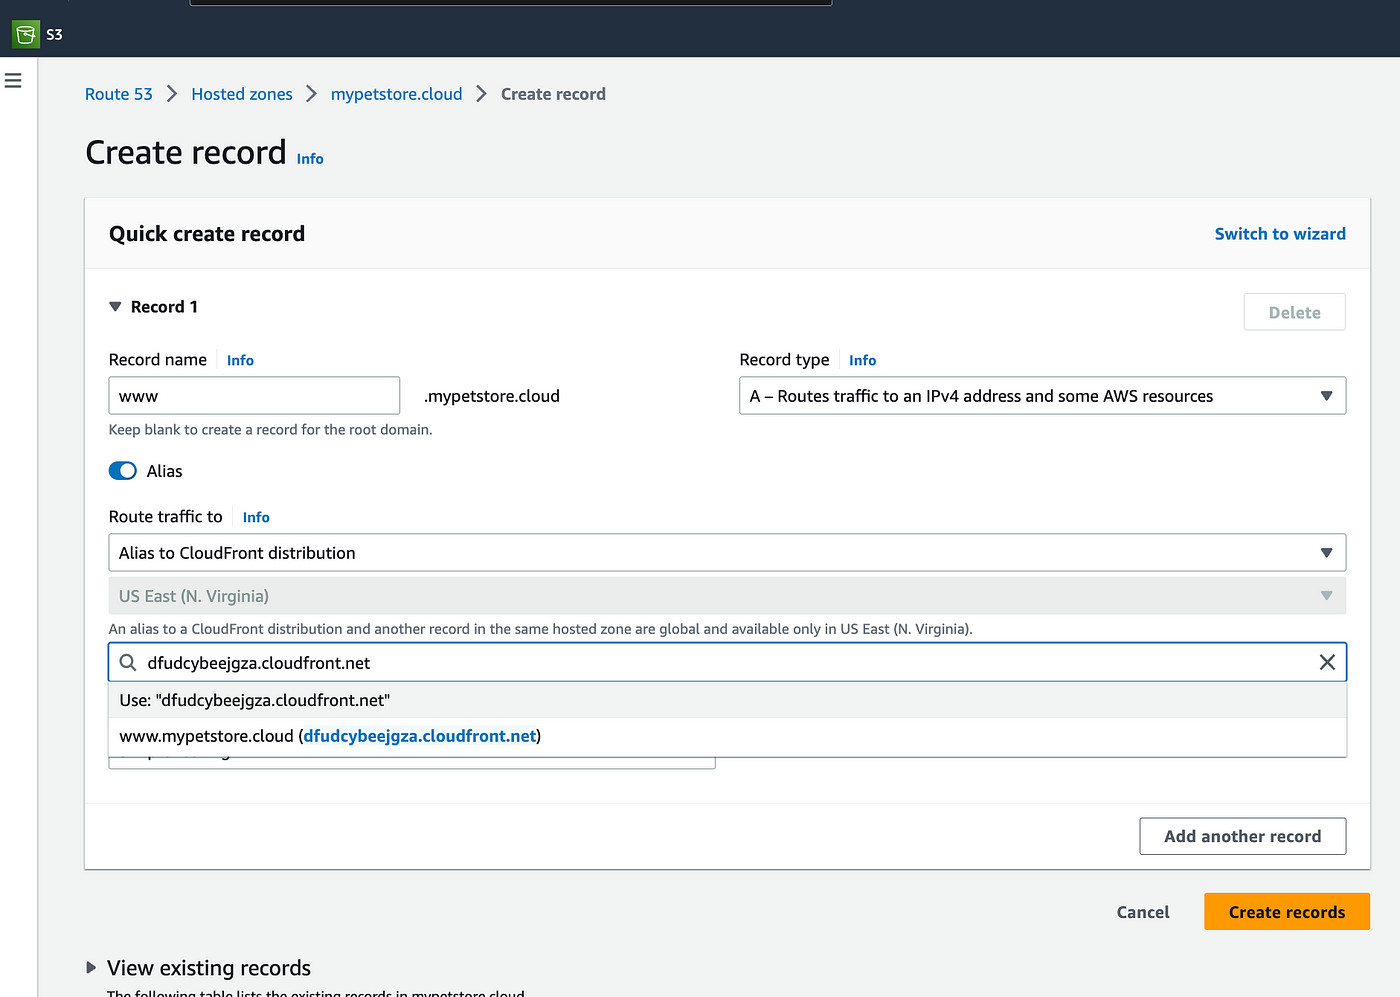
Next, navigate back to Route 53, into our hosted zone, and create a new record.
One record for “www.mypetstore.cloud” and another for “mypetstore.cloud”
Under each record, allow the “Alias” to Cloudfront distribution, specify the CloudFront link we created early, and create the records.
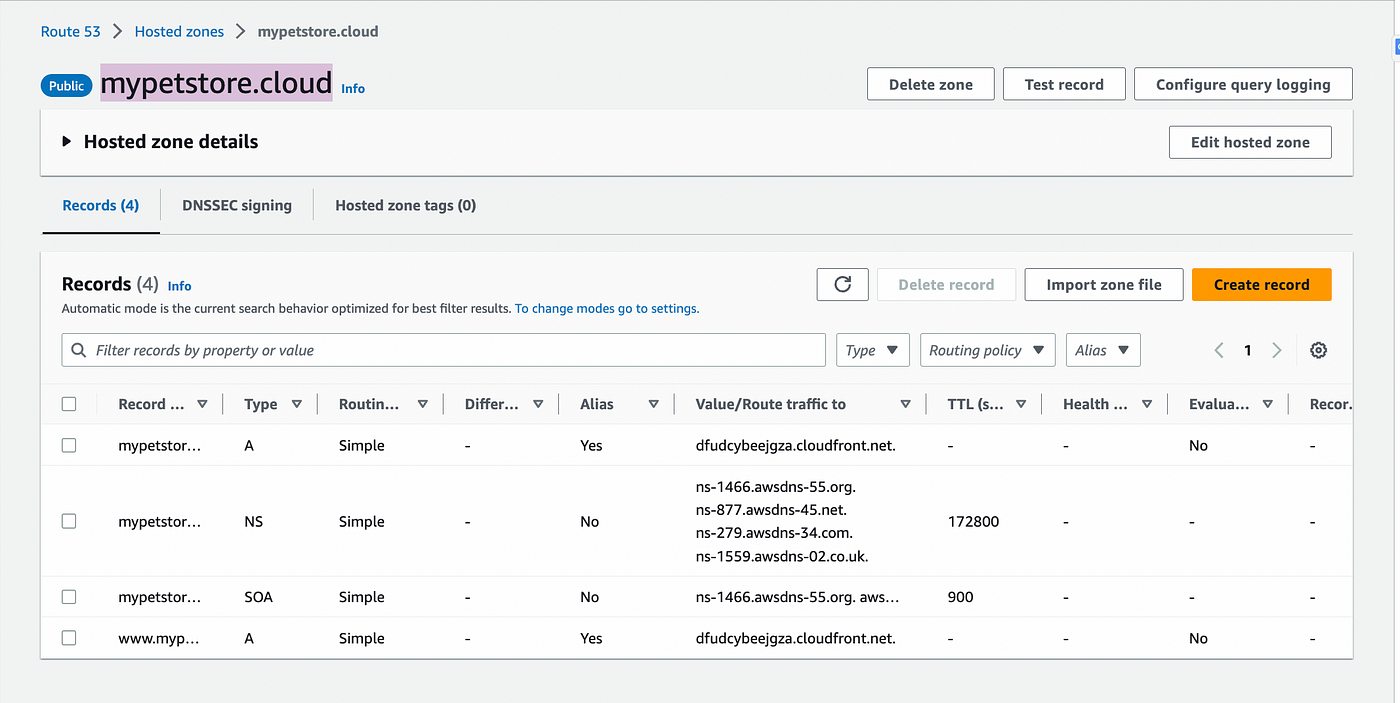
We should have a total of four records now within our application hosted zone, with two indicating “Alias” as the type.
Now, let's verify that the domain names are working just as well as the HTTPS for the React app.
Verify with just the root domain name : “mypetstore.cloud”
And verify with the www subdomain name as well: “www.mypetstore.cloud”
Awesome! Our site now fully functions and can be accessed anywhere with the custom domain created for it. Great job!!
What Next?
Congratulations! 🎉 You have successfully hosted a React application using AWS S3, CloudFront, and Route 53. You can show off your efforts to your peers.
Please note that this tutorial is designed to provide introductory exposure to AWS and is targeted at beginners. Follow for more updates on similar topics as I embark on my journey to AWS.
